Howdy Denizens! These are a pair of battle reports that form my first as an Archon! Against Tau, of all things, one of the armies we have the hardest time with. I sure found out pretty fast how destructive they can be. It was very informative, and helpful tactically. Without further ado, here we go.
Both games used the same lists.
The Kabal of the Baleful Eclipse
HQ
Archon--Combat Drugs, Venom Blade, Huskblade, Soul Trap, Shadowfield
Elites
4 Trueborn--4 Blasters
-----Venom, extra splinter cannon
3 Trueborn--2 Splinter Cannons
------Venom, extra splinter cannon, night shields
4 Grotesques--Aberration, Venom Blade
------Raider, Enhanced Aethersails
Troops
3x 10 Warriors--Splinter Cannon
----Raider
5 Wyches--Haywire Grenades
----Venom, extra splinter cannon
Fast Attack
2x 9 Reaver Jetbikes---3 Heat Lances, Arena Champ, Venom Blade
Heavy Support
2x Ravagers--Night Shields
Tau Empire
HQ
Battlesuit Commander--Counter-fire Defense System, Iridium Battlesuit, Drone Controller, Onager Gauntlet, Multi-spectrum Sensor Suite, Shield Generator, Stimulant Injector
Elite
Riptide--Ion Accelerator, SMS, Stimulant Injector
Crisis Suit Team--3x Plasma guns, Missile Pods
Troops
3x 12 Fire Warriors--Sergeant
Fast Attack
8x Pathfinders--Blacksun Filter, Recon Drone, Sergeant
4x Piranhas--Blacksun Filter, Disruption Pod, Burst Cannon, 2x Gun Drone
Razorshark Strike Fighter--Disruption Pod, Blacksun Filter
Heavy Support
Hammerhead Gunship--Ion Accelerator, Blacksun Filter, SMS, Disruption Pods
Hammerhead Gunship--Railgun, Longstrike, SMS, Blacksun Filter, Disruption Pods
3x Broadsides--High Yield Missile Pods, Blacksun Filter (he forgot to put a support system on!)
GAME 1
Mission: The Scouring
Deployment: Hammer and Anvil
First Turn: Tau Empire
Night Fight: No
Tau Warlord Trait: No scatter when deepstriking
DE Warlord Trait: Enemies within 12" test on their lowest Ld, not the highest
Drugs: Splintermind (Awwww yeah!)
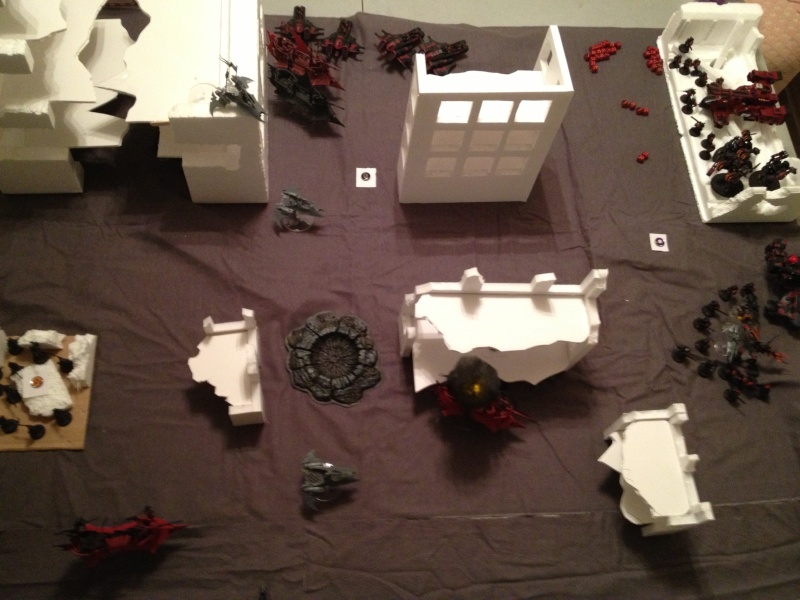
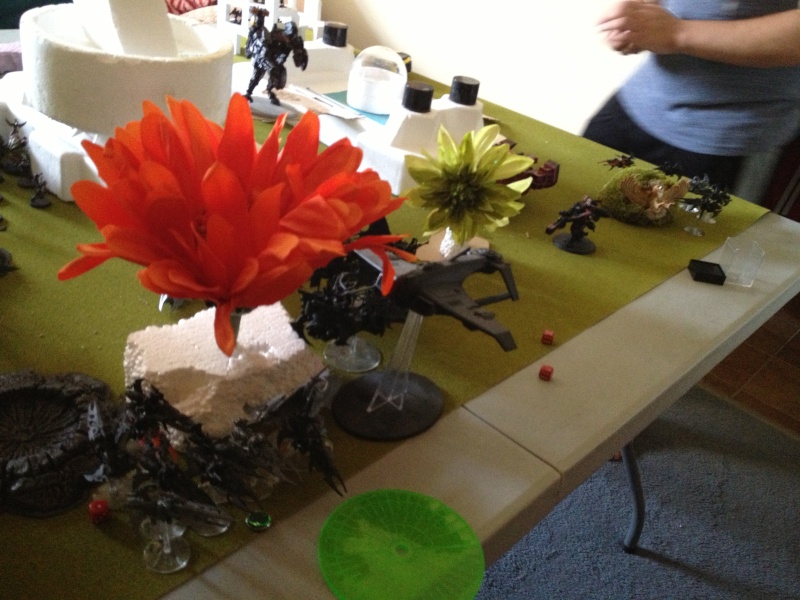
Tau Deployment: Excuse my bad pictures--I'm only using my phone for images. Additionally, neither my army nor our terrain (the vast majority of which I've built) is painted yet.

He castled up all of the way at the back of the board (we are playing on a city-themed board with some LOS blocking.) He also left his Crisis Suits to deepstrike in, some Fire Warriors to walk on later, and the Flier in Reserve. Even so, I looked across the board and said...
DE Deployment:
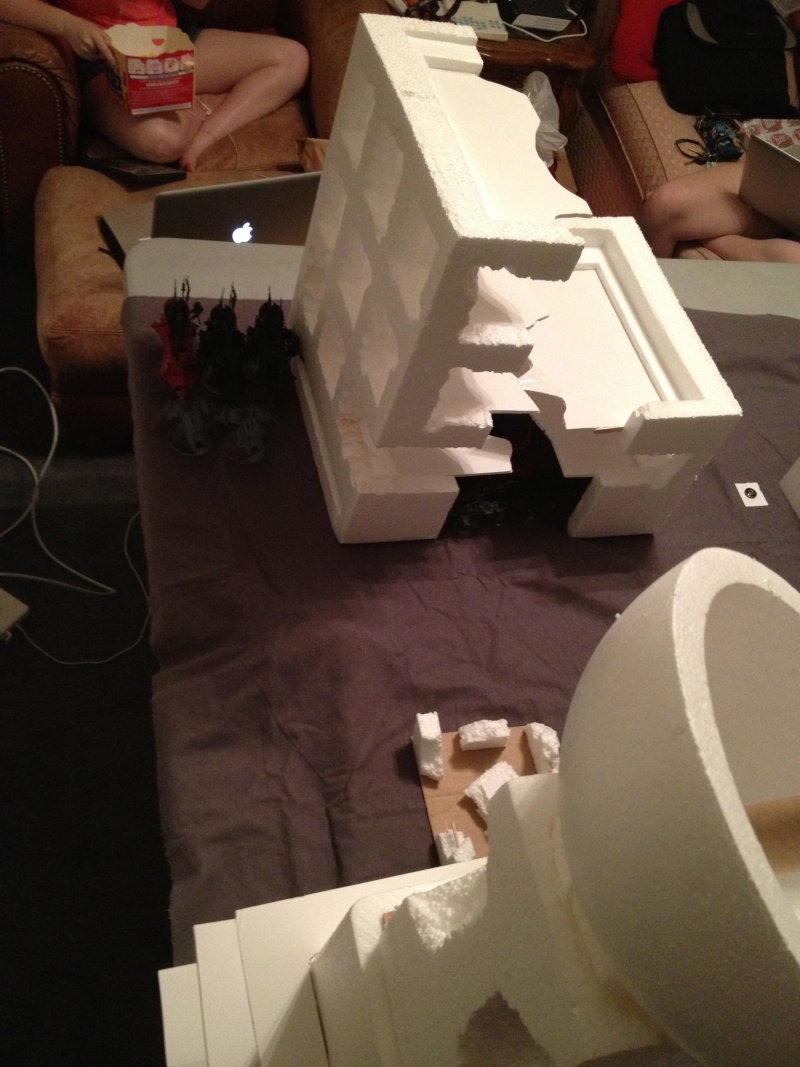
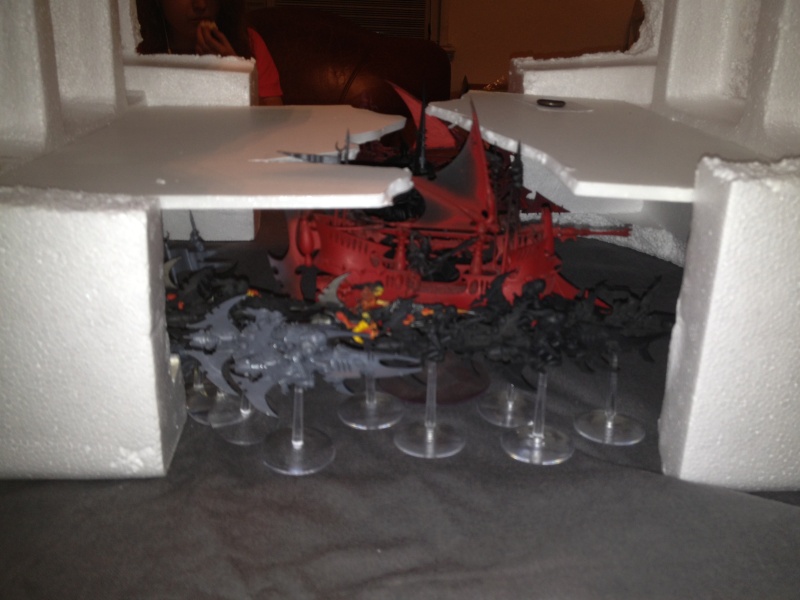
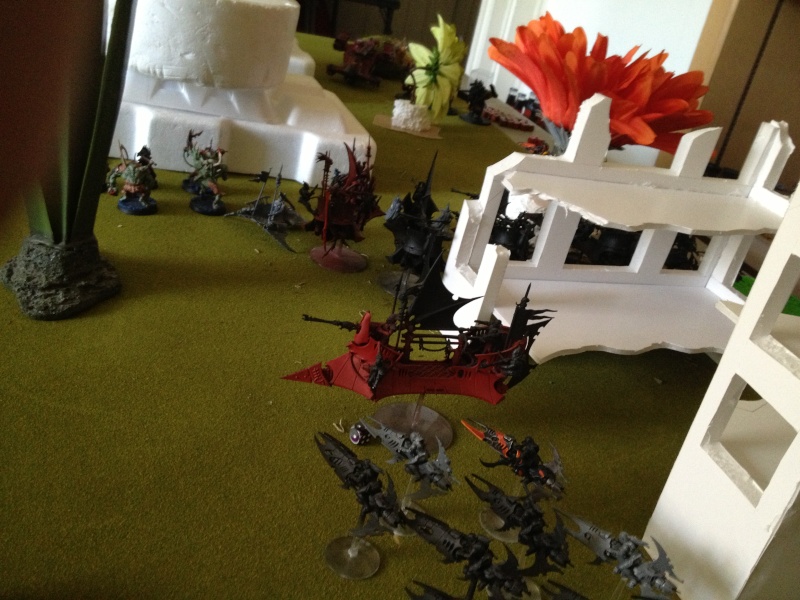
SCREW THAT!! I hid my entire army in and behind this huge building all the way on the other side of the board. This may have been mistake number one, but we'll get to that later. The reavers hid both inside the building and on multiple levels of the ruin in the back right corner:
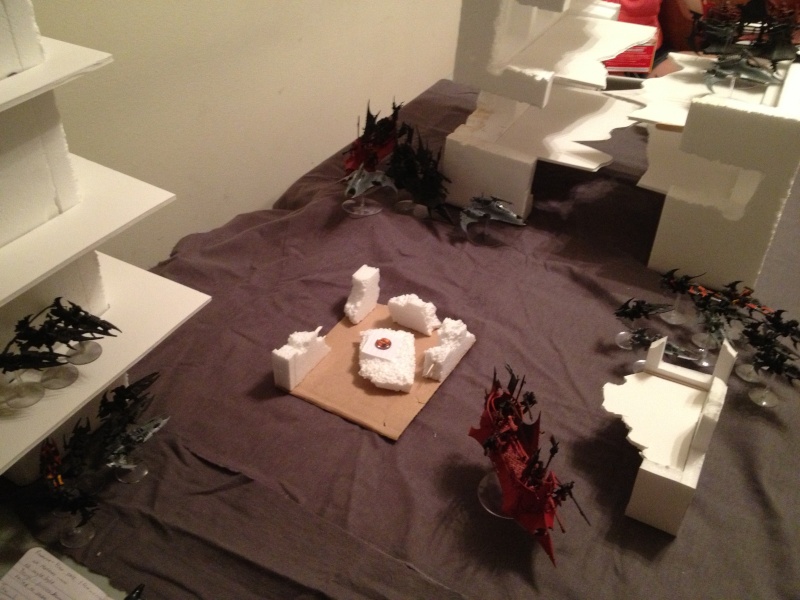
Sorry I don't have a better shot of the whole board. Not sure how that happened.
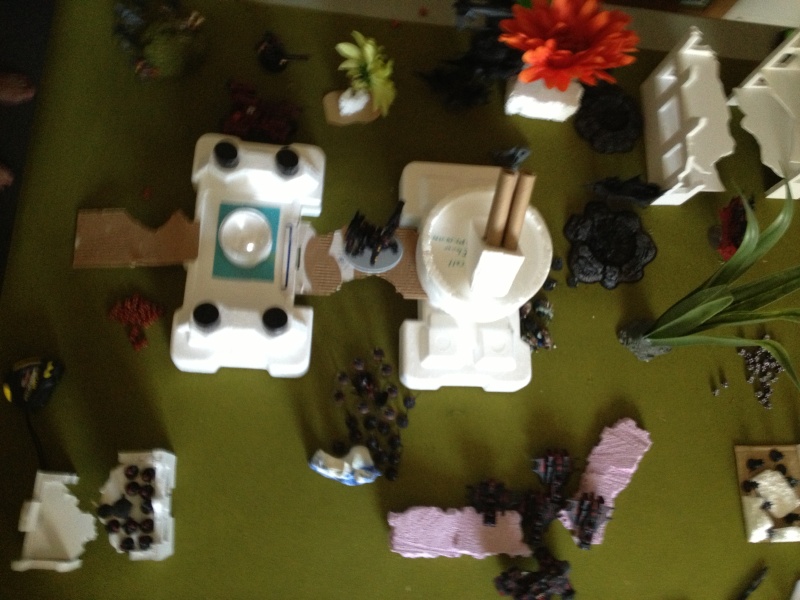
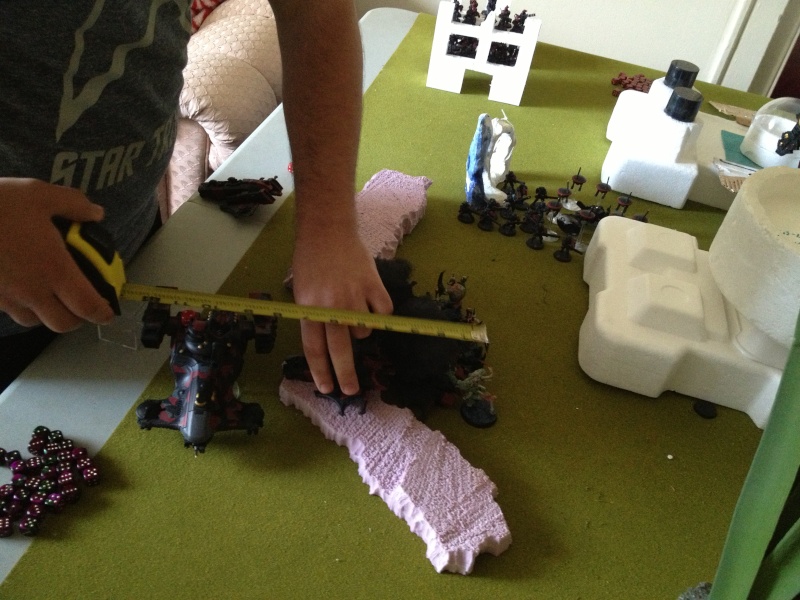
My main objective in deployment was to minimize damage Turn 1. I think I was too timid here, just terrified to lose stuff. Anyway, we check objectives and I have the four on my side in the broken remains of the building in the middle of the board. Another on the second level of the huge building all my stuff is behind is a two-pointer, and the one right in front of the huge building that the Commander is hiding behind is a 3. In the Tau half, the one in the second level of the medium building in the middle is the 1 pointer, the one back in the middle of his deployment in the open is a 3, and the one all the fire warriors and red Hammerhead are squatting on is another 2. I attempted to seize and failed.
Tau Turn 1

The Riptide shuffled around the edge. All the tanks shuffle to get their jink saves up, and the Piranhas advance a bit while detaching their drones, who join the lone commander. Almost nothing in the army can see any of my stuff. The Riptide attempts a cheeky blast at the only Reaver he can see in the clump of stuff inside the huge building, but he gets hot and can't kill anything. The Iontide attempts the same, but scatters off. The Riptide and Commander with drones attached shuffle back behind LOS blocking with their jump moves.
DE Turn 1
Everything hops out of the building. The Reavers hidden under the building turbo boost over the Pathfinders, getting a whopping 22 hits, but only managing 7 WOUNDS (!!) of which he only fails three saves, killing the recon drone hiding at the back and one other guy. HOLY COW that was bad. A Raider with Warriors inside, which went 12", snapshot kills another, enough for that break test, which they fail and run. The venom with the Wyches, Blasterborn, Ravager, and the Grotesque and Archon raider all turbo boost to get into attack range next turn. The back squad of Reavers turbo boost to get their good cover saves. All of the Dark Lances from on top of the building shoot the Piranhas, but I do not even roll a glance.
After turbo moves:

Tau Turn 2

He rolls for reserves and gets only the Fire Warriors. The Pathfinders fail to rally and run another 4" toward the board edge. Shooting sees the Fire Warriors wreck my Archon's ride (the red Raider all the way at the front in the pictures.) The Broadsides explode my Ravager that turbo-boosted into the middle. The Fire Warriors that came on from Reserve rapid fire the Reavers, killing three, but they hold. The Piranhas put 2 hull points on the other Ravager on the other side of the huge building. The Commander's drones then fire into the Archon's unit and kill a Grotesque. With some more wounds to take, I figure I'll tank them on the shadowfield. Or not, as my Archon fails his 2nd shadowfield save. (-.-) The Riptide and Ion Hammerhead contribute, leaving just the archon and one wounded Grotesque remaining. The Riptide and Commander's unit jump back to safety.
DE Turn 2

The Raiders on top of the huge building hop down. The Venom on top dumps the Wyches off near the objective (2nd floor of the huge building) and moves over to try to get shots at the Riptide. The Archon and his Grotesque line up for a daring charge. The Reavers in the backfield prepare for a very large multicharge. The Splinterborn Venom emerges to take shots at the Broadsides. The Blasterborn move forward to begin to shoot. In a case of total dice abandonment, my entire army's shooting manages 1 wound to the Riptide, and literally nothing else. It was pretty abysmal. The Reavers in my backfield turbo boost into the building for safety, as I realize they are a valuable scoring/denial unit and play like a sissy. Oh, the Reavers in his backfield stun the Hammerhead with their 3 heat lances. They multicharge said Hammerhead (who I couldn't actually hurt...I think I gave them an extra pain token during the game...whoops. Luckily, it never mattered) and the Pathfinders, who passed their Ld test to stand and fight. The Grotesque dies in Overwatch, but the Archon makes it into the Riptide. The reavers kill 1 Pathfinder and put an illegal hull point on the Hammerhead, but the Pathfinders hold. In a fit of glory, the Archon rolls two 6s to wound with his Huskblade, the Riptide fails 1 invulnerable save, and it crumbles to ash. The Archon traps his soul, going up to S6.
Tau Turn 3
The Flier shows up, but the Crisis Suits stay out. The Pirahnas move up, but pretty much everything else sits still or shuffles to get jink. The stunned Ion Hammerhead snap shoots into the Splinterborn venom and gets 4 hits with the SMS (!) and puts a hull point on it. The Piranhas wreck the Wych's Venom on top of the huge building. The Broadsides finish off the Splinterborn's ride but don't blow it up miraculously. The Fire Warriors by the Hammerhead get FIVE PENS and blow up the Raider on the far side (by the giant building,) killing six in the explosion and making the survivors run. Longstrike's Hammerhead blows up the other one, killing a few, but the Commander's unit of Drones come in and obliterate the rest. The Fire Warriors by the Archon take a wound off him (he managed to survive by cover like a boss.) The Flier blows up the Blasterborn Venom, killing two in the explosion. The Fire Warriors all the way in the corner (can't see them in the picture--sorry :(take pot shots at the survivors, but they hit the deck and survive. In combat, the Reavers kill enough Pathfinders to make them run and then sweep them.
DE Turn 3

Holy crap that turn hurt. So I don't have much left now, but I try to kill whatever I can with what I've got. The Splinterborn realize that the Piranhas and the Commander are grinning at them and so attempt a last ditch effort to hurt a Broadside. The Reavers in his zone just shuffle a bit, as some juicy Fire Warriors are next on the menu. The empty Raider (who dropped off the Warriors on the 4 point objective there and you can't see in the picture--sorry this is so bad) moved to get a shot off. The Ravager, who is hiding on the long table edge on the other side of the giant building scoots back to try to stay out of range of the Piranhas. The fleeing Warriors don't rally and they flee another 11". I forgot about the Wyches in the ruins because I couldn't see them. Awesome. The Reavers in my half turbo boost behind the giant building as part of a devilish and desperate plan I'm formulating to be my last shot at a win. The empty Raider shot at the Hammerhead but missed, and the Ravager did nothing to the Piranhas. The Blasterborn, who went to ground, snapshot at the flier but don't hit. The Splinterborn do not even wound the Broadsides. The Reavers double tap the Fire Warriors, killing one, then charge alongside the Archon, who dies heroically in Overwatch, slaughtering all of them and consolidating, waiting to get lit up. I was really hoping to pull a punch, so I even multicharged the tank, but this is the one time I rolled really well all game and overkilled them by like four wounds without even needing to sweep them.
Tau Turn 4

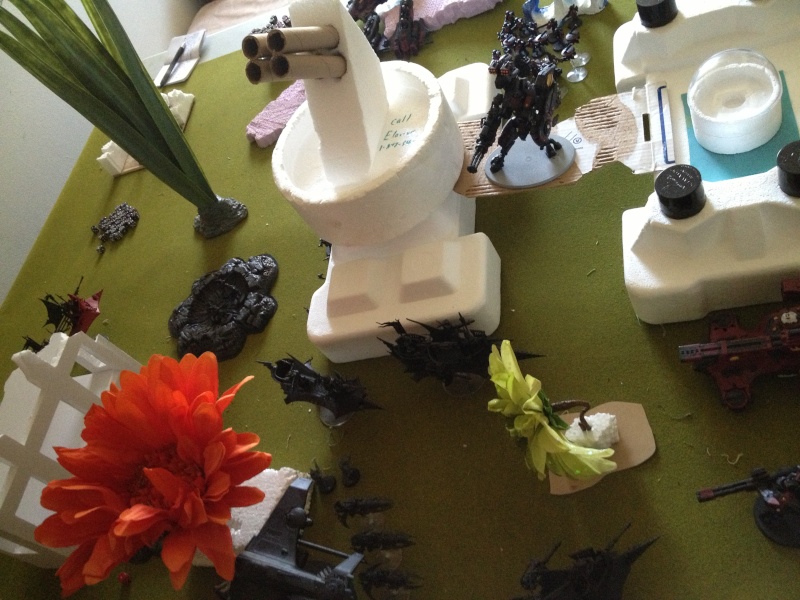
I took this picture a bit late, there are actually initially Reavers in his half over there by his Fire Warriors...
The Crisis suits come in and try to land next to the four pointer, but scatter back a bunch. The flier advances toward the Warriors squatting on the 4 pointer. The Piranhas are actually blocked from going the way they want to go by my fleeing Warriors, so they instead go towards the middle. Everything else just kind of wanders around slowly toward objectives. The Fire Warriors blast the Reavers off the board (Do you get cover saves from consolidate moves? I didn't know.) The Splinterborn, punished for their failure to hurt anything all game got demolished by the Broadsides. The flier overcharged and fired the large blast into the Warriors on the objective, who go to ground and only lose three, the survivors hold. The Crisis Suits stun the empty Raider (I think he just wanted the personal satisfaction of killing ALL of the vehicles) and jump toward the 4 point objective.
DE Turn 4

I realize I'm pretty well hosed at this point. I have one last trick up my sleeve, though. I have almost nothing left, so movement is pretty short. My remaining Reavers move and turbo boost behind the large piece in the back corner of my table edge (I gotta work on my camera skills--sorry, first batrep. The building is all the way in the bottom left corner of the board as you look at the picture.) to hide for my cunning last ditch plan. The Warriors rallied and moved into range to get at the objective on the second level of the huge building on turn five. The Wyches move likewise, as I finally remember they exist. The Blasterborn take some cheeky shots up at the flier, since they have nothing else to shoot, but miss. The Warriors on the 4 point objective rapid fire the Crisis suits and I don't even roll a single wound. The Ravager, however, also hiding behind the huge building, manages to bury all three lances in their chests and kills all three.
Tau Turn 5

The Fire Warriors move up and squad on the other 2 point objective. The flier moves over and puts a last glance on the Ravager, wrecking it. The Ion Hammerhead explodes the empty Raider. The Piranhas move up and shoot the Warriors threatening the 2 point objective in the huge building, but they hit the deck and roll two 6s (!) managing to survive.
DE Turn 5
I didn't take a picture, because we didn't really play through turn 5. Only a couple of things mattered. My Wyches moved through cover up far enough to be on the 2 point objective on my side. Then, the cunning plan I'd been ruminating on came into effect. My last squad of Reaver Jetbikes were scoring because of the Scouring. They moved and turbo boosted onto the 3 point objective in the middle of the board. If the game ended on Turn 5, that would give me 9 points from objectives and a point for a Fast Attack kill (the Pathfinders) for a total of 10 points compared to my opponent's 5 points from objectives, all three secondaries and one Fast Attack kill (the Reavers) for a total of 9 points. However, I rolled to see if the game went on and rolled a three, meaning that my poor army would get decimated and so I shook for a good game at that point. TAU VICTORY
Thoughts from the first game: Holy cow that hurt. I was thoroughly not prepared for the hurt he could put out in a turn. I also think my deployment was really bad, as I tried too hard to stay hidden and then tried to be super aggressive, which didn't work because then I couldn't hit the right targets with the right stuff. Especially since we played the short table edges, where Tau emphasize their range advantage the most, this hurt a lot. Additionally, I split up my forces by trying to attack both flanks, which was a huge mistake. I should have put all my firepower down the one lane where the Reavers wiped the Pathfinders. All of that said, I had a really tough game dice-wise. It's for sure not the whole reason I lost, but I consistently rolled a lot less damage than I should have. Over the course of the game, I buried about 15 lances into the Piranhas and didn't even get a damage result. Lesson learned--don't always count on your 4+ to do what it's supposed to. Redundancy seems to be key.
These ideas in mind, I asked for a rematch with the same lists, but a different table, just to change things up a bit.
GAME 2
Mission: Crusade (3 objectives)
Deployment: Hammer and Anvil (ugh)
First Turn: Tau Empire
Night Fight: No
Tau Warlord Trait: 3d6 jump move
DE Warlord Trait: Units in 12" use his Ld
Combat Drugs: Grave Lotus
Deployment: After my lesson from last game, I didn't try quite as hard to hide all of my stuff, since I actually wanted to kill things this game. The objectives ended up one in the middle behind a building, one in building area terrain, and one on the top floor of a small building in the Tau half.


Tau Deployment:

He won the roll to pick table half and turn again, so he set up on the side with the objective in the building and set up with the majority of his firepower on the right (bottom in the picture) side of the board. On the left side he only kept the Broadsides and the Railgun Hammerhead, with the Riptide in a position to support. The building with the objective has Pathfinders on top and Fire Warriors inside.
DE Deployment:

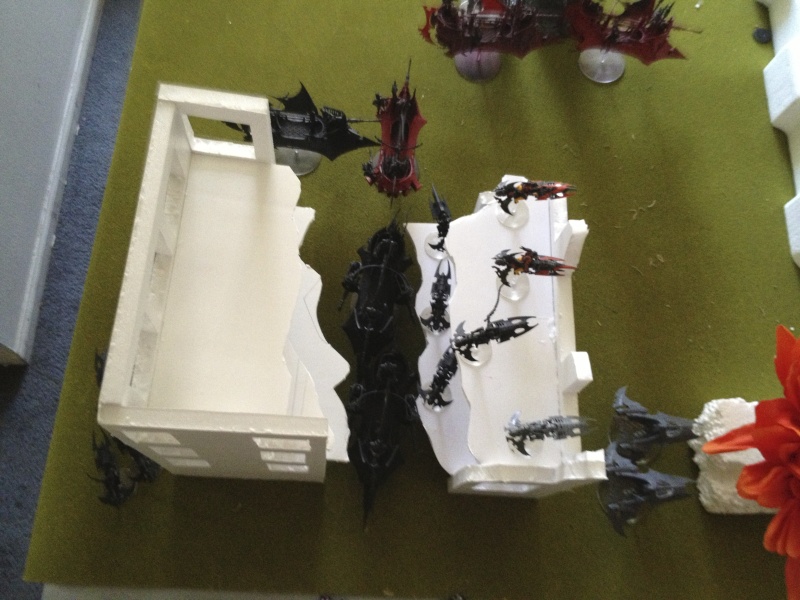

I premeasured the range of the Broadsides and deployed in such a way that I was just out of range of the big guys. I also did a hardcore refuse flank, and basically sent my entire army away from the left side of the table to attempt to avoid the problem I had last game in which I split up my forces. The only folks I left on the left side was a squad from one of the Raiders, which is the sideways one shielding the black one. I made a mistake and left my Archon's Raider in front, originally thinking that I should keep it forward to make sure it'd make some ground, but forgot it had Enhanced Aethersails to counteract that problem a bit.
I attempted to seize and failed.
Tau Turn 1
Sorry for the blurry bit--we had to rush this game a bit.
The Piranhas move up and detach drones, who join the Commander. The Riptide shuffles over to get LOS on something. All the vehicles shuffle to get jink. Shooting sees the Broadsides and Riptide wreck the Blasterborn Venom (forgot about those silly SMS that don't need LOS.) Longstrike's Hammerhead immobilizes the empty Raider, and then the Ion Hammerhead blows up the Archon's ride, killing a Grotesque in the process. Should have hidden it and let the Aethersails do their job, gosh dangit.
DE Turn 1


Everybody hops out from inside/next to the building and says hello to that flank. The Ravagers fly out of the building and prepare to light up Longstrike. I then bury almost 10 Dark Lances into the stupid thing and don't a SINGLE RESULT TO STICK between failing to do anything and ridiculously hot jink saves. I think he made six 4+ saves in a row. Then, in a desperate attempt to kill something on that side so I don't get my whole army obliterated, the Reavers bladevane the Broadsides. This combined with a venom and the Splinterborn shooting at them fails to put a single wound on them. In short, my entire army shot at 4 models and accomplished nothing.
Tau Turn 2
I forgot to picture. The Crisis suits and flier come on this turn. Basically the Piranhas move up a bit further and everything else shuffles. The Railgun Hammerhead penetrates a Ravager, but I made a jink save (first one out of both games!!

) The Night Shields then leave its SMS out of range. The Crisis suits shoot a lot at the other Ravager, but don't manage to hurt it (Go go AV11!) The flier blew up one of the Raiders, killing six of the Warriors in the explosion, who hold. The Riptide's blast scattered off the Ravagers and stunned the other Raider. The Broadsides shot the Reavers, killing four, but they held.
DE Turn 2


I moved everything up. The Wyches hopped out to await their prey (the Piranhas) and lent their Venom to the Blasterborn, who mounted up and pointed at the Crisis suits. The Grots and Archon press themselves against the wall to wait for the Tau to round the corner. The Reavers that bladevaned the Broadsides move their two remaining Heat Lances to the rear arc of Longstrike's Hammerhead, while the other Reaver squad moves such that they can get a variety of places with the turbo boost. Shooting sees the Splinterborn and Venom kill 1 Broadside suit and a Ravager kill one more (rolled three hits and two 1s to wound
) The survivor held. The Blasterborn's venom took a wound off a Crisis suit, but the Blasterborn themselves rolled snake eyes to wound and didn't hurt them at all. Luckily, my all stars the Reavers bladevaned them, killing all three Crisis suits and gaining a pain token. At the other end, 2 Heat Lances and 6 Dark Lances went into the Hammerhead, but again failed to stick a single result on it. (!!) The Reavers jump behind the little hill thing to avoid some incoming fire.
Tau Turn 3
Sorry this is so blurry


The Fire Warriors did not arrive. The flier moves up to blast the Reavers, while the Piranhas move around the corner to get LOS on the Grotesques. The Commander and the Fire Warriors just move up about 6" and sit around in midfield. The Piranhas fired in, taking two wounds off a Grotesque. The lone Broadside explodes the Splinterborn's Venom, pinning the survivors. The Railgun explodes the other Venom that the Blasterborn stole, killing 1 more of their number. Both squads hold. Between the flier and the Riptide, four of the Reavers in the back went down, but the survivors don't run.
DE Turn 3
Sorry this is the derpiest pic ever


Everything shifts up in a position to shoot multiple targets. The Reavers again move into rear arc, while the Grotesques move out to make a charge. The snap-firing Splinterborn don't manage to hurt anything. In their attempt to kill that stupid Broadside, the 5-man squad of Reavers turbo boost over him, bladevaning him for 1 wound. The other Reavers, who are down to just the 1 Heat Lance, just use it to remove that last wound to finally kill them for a second pain token. The Raider full of Warriors next to the Riptide FINALLY managed a damage result and stunned Longstrike's Hammerhead, while the Blasterborn, Ravagers, and Warriors inside the Raider shot the Riptide and put three wounds on it. The immobilized Raider shot into the Ion Hammerhead (as he's done the last two turns too) and accomplished nothing. The Reavers that didn't turbo boost assault jump into cover. The Archon and Grotesques charge the Piranhas, exploding 1 and wrecking the other two. This, I believe, was a huge mistake. I should have attempted a multicharge on the Fire Warriors and the Commander's unit, but I didn't think to at the time because he had blocked his Commander's unit off with a line of Fire Warriors, but I could have tried to go through terrain to get there. I'm not sure. Anyone have any better wisdom on the ins and outs of the choices here? In any case, I ultimately chose the Piranhas because they're the one thing in his army that are actually as fast as most of my army. We also decided at this point that the game would end at the end of turn 5, since my opponent had someplace to be.
Tau Turn 4

The Fire Warriors finally came on from Reserve by the Reavers. The whole left side shuffled around to shoot the Archon's unit. The flier moved up to take shots at the Wyches. The Fire Warriors blast the Reavers, killing 2 of 5. The survivors failed morale and fled 14" back. Everything on the far side of the board shot at the Archon and his Grotesques, killing three of them and shorting the Archon's shadowfield (although it actually tanked about 10 wounds this time before dying.) The Ion Hammerhead blasted the Warriors on the objective, but they dove for cover and only lost three and passed morale. The flier's turret turned around and blasted the Wyches, killing four, but he survivor didn't break. The Riptide wrecked the Raider with all of the Warriors inside it, but they weren't pinned.
DE Turn 4


The Ravagers moved such that they could see both the Riptide and the Hammerhead in case something ridiculous happened. The Reavers that had tried twice to blow up the Hammerhead again jumped into rear arc, ready to finally do their part. The fleeing Reavers rallied and moved 3" in the direction of the flier, as they already had to snap fire. Accomplishing a move through difficult terrain, the Archon and his Grotesque buddy moved toward the Ion Hammerhead, and the lone surviving Wych moved toward the Piranha. First, the Reavers put their heat lance into the no cover save (had not moved because it was stunned) Hammerhead, but only rolled a 3 for their armor pen and FAILED TO KILL IT. This is the immortal Hammerhead, seriously. The other Reavers snap-fired at the flier, but failed to hit with their heat lances. The immobilized empty Raider in the back fired into the Piranha (after the Wych missed with her haywire grenade,) putting a hull point on it with a glance. The Warriors rapid-fired the crap out of the Riptide again and finished it off for a pain token. The Blasterborn had enough and finally cracked the unkillable Hammerhead with a final glance. The Ravagers, then, turned their attention under the bridge to the Commander's unit, killing 4 drones and putting a wound on the Commander between them. The Splinter Cannon from the Warriors on the objective killed another drone. The Splinterborn shot the Fire Warriors in the corner and killed 3, but they held. In assault, the Wych charged and wrecked the Piranha and the Grotesques and Archon fail to do anything to the Hammerhead.
Tau Turn 5
I didn't take a picture because almost nothing moved, except the Commander's remaining 2 drones and the Fire Warrior unit in front of him walked up a few inches. They lit up the Grots with markerlights (only significant contribution the Pathfinders made all game) with 8 markerlight hits (out of 9 shots!). However, the Fire Warriors over there rolled abysmally (50% hits on 2+!!!) and only killed the Grotesque, forcing the Ion Hammerhead to kill the Archon. The Fire Warriors in the backfield thought about shooting the Splinterborn, but instead rapid fire the Ravager, putting a hull point on it. The flier then shot the Warriors on the objective, but they went to ground again and only lost 2. The survivors held.
DE Turn 5
We didn't even play through to the end of turn 5, we just went through my difficult terrain roll to see how far my warriors, who had been sitting forgotten in a crater from their Raider since like Turn 2 to sprint onto the other objective. Since my opponent had to go, we just left it at that because as we tallied up the points, that extra objective netted me 2 objectives and linebreaker for a total of 7 points, compared to his 1 objective, First Blood, and Slay the Warlord for a total of 5 points. DARK ELDAR VICTORY
Thoughts: Okay, so dumping 15+ dark lances into the Hammerhead with absolutely nothing to show for it really hurt my ability to do much--it meant I was continually wasting my firepower on that silly thing I couldn't hurt, while its SMS and railgun continually demolished vehicles. I began to wonder if it would have been better to shoot more at the Broadsides--they would have had a worse save and I probably could have gotten rid of all three first turn with those lances and then wouldn't have wasted them so much. But that's what I get I suppose for expecting that my AT would be successsful AT. :DI feel like I played a much better game this time, though I know I made some mistakes. I'm reasonably sure that I should not have charged the Grotesques out at that time, but rather should have waited for him to come closer with the squads I really wanted to kill. I suppose after the last game I really didn't want to lose a lot of them before they got to kill something at least. I also didn't know prior to the game he'd be bringing a flier, and I didn't think it'd be a big enough deal to jumble stuff around just to counter it.
MVP: I think in both games the MVP goes to the Reavers. The first game, they were the only unit that reliably killed anything, and in the second game, they sucked up more than their fair share of firepower (3+ cover saves followed by 5+ FNP is awesome.) I know I didn't use them as well as I could have, but i'm hoping to learn more about how to use all of this stuff as I play more games.
Well that's my first two games as an Archon. Feel free to rip apart my tactics, listbuilding, etc. because I know for a fact I screwed a whole lot of stuff up. Thanks for reading!