The tablesHello everyone.
In the recent years, i have been the dude that invites everyone to play W40K, and while everyone of my friends has always been very prompt to bring terrains and buildings (be it the very standard Maccrage wreckage or hundreds of bucks of Imperial Ruins and citadels), the tables have always been my responsability. I also live in a kinda small (3 rooms, 80 m3) appartement, so i can't have a room dedicated to W40K (especially considering the fact that there is a girl lurking around).
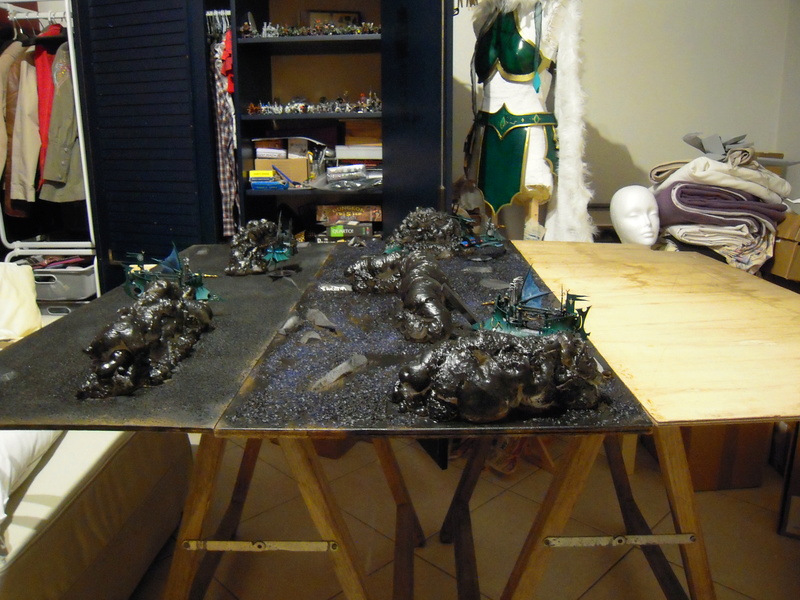
So i had to imagine a way to let multiple games of W40k be played at my home, on large tables (180cm*120cm), while allowing myself to store those tables at the basement without breaking my back everytime. I came up with this very cheap, very practical solution :
- 2 trestles (10 euros each)
- 2 180cm wood rod (50cents each)
- 3 planks of wood (or conglomerate) measuring 60cm*120cm (5 euros each).
Place the rods perpendicular to the trestles. Dispose the planks on the rods. Tadaaa. I built myself 2 gaming-size tables for the modic sum of 70 euros.
And we played. And played. But now, after more than a year of loyal service, those tables are beginning to feel a bit... bland. So, with the help of my craftful girlfriend, i decided to take a shot at ornating them. For cheap (coz you know, i'm a teacher). And i'm pretty happy with how it's going.
The landscape 
 What i used
 :
- Expansive foam : 13 euros for the can, more than enough.
- Black rubber-coating : 15 euros for the can, more than enough
- Glue : dirt cheap
- Fishtank decoration stones : 5 euros for 1 Kg
- Little chutes of foam from my girlfriend's cosplay atelier.
- Sandpaper : 7 euros
The process :
- Polish the wood surface with sandpaper
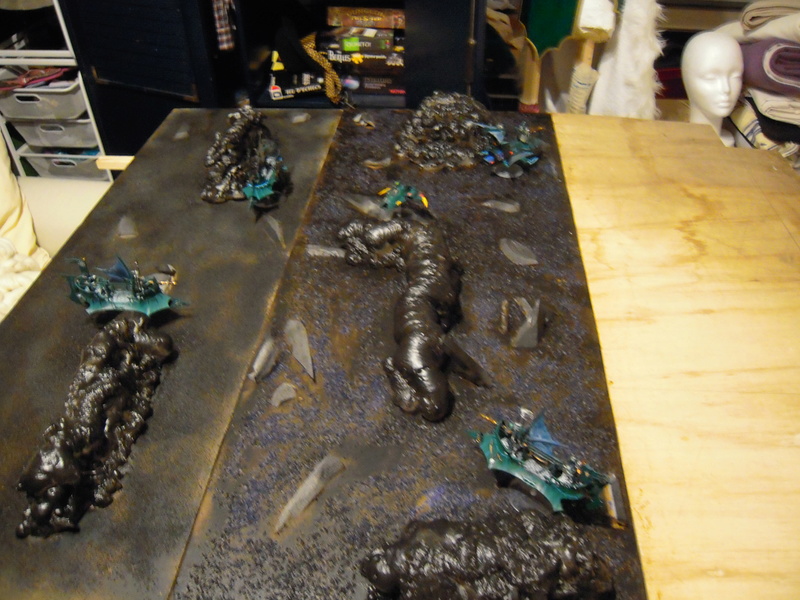
- Create big blobs of expansive foam, and let it grow for an hour or so
- Glue the little chutes of foam to create minor
relief- Paint the surface with glue
- Make those little rocks rain over it, let them be glued, shake off those that didn't glue
- Coat the entire table with coating to make it stick
This is were i currently stand. The rest is basically : have fun painting it.
It's my first attempt at table decorating, and i don't claim to have achieved anything remarquable, but if you think this is cool, let me know, and i'll do a tutorial picture by picture, because... there is still one plank to be done before i can get to painting

Cheers


