|
|
| | DARK ELDAR UNIT GUIDE - Plastikente |  |
|
+21Shadows Revenge ctadkins FenWulf Chaeril maelstrom48 Erebus Panic_Puppet Mngwa Skye26 Niiai Hess AvInNebr Eighty Thor665 Grokfog McBegbie commandersasha Count Adhemar Mushkilla Squierboy Plastikente 25 posters | |
| Author | Message |
|---|
Plastikente
Sybarite
Posts : 373
Join date : 2012-11-15
Location : London
 |  Subject: DARK ELDAR UNIT GUIDE - Plastikente Subject: DARK ELDAR UNIT GUIDE - Plastikente  Mon Dec 10 2012, 23:37 Mon Dec 10 2012, 23:37 | |
| THIS THREAD REFERS TO THE 5TH EDITION CODEX, NOT THE LATEST ONEINTRODUCTION Having read the opinions and experiences of many other Archons, here in the Dark City and on the boards at 40k Online, I was inspired to begin a crazy project: to collect and distill the wisdom that is out there in the Webway and bring it together in one place to create a guide to the forces at our disposal. I hope that what you find here will be interesting and perhaps enlightening, whether you are an ancient veteran or have newly risen to power, Archon, Succubus or Haemonculus. Each section of this guide has been posted separately in the board during the draft stages, so what you read here is not just my own mad ravings, but has been tempered and refined a least a little by the other denizens of this city. Nevertheless, feel free to comment on and debate the advice given here. Read my words, heed them or ignore them, but wherever you venture, do not dare to return here unless you bring slaves... -Plastikente INTRODUCTIONPART ONE - GENERAL TACTICAPART TWO - CORE UNITSPART THREE - ELITESPART FOUR - FAST ATTACKPART FIVE - HEAVY SUPPORTPART SIX - SPECIAL CHARACTERS
Last edited by Plastikente on Mon Oct 06 2014, 17:04; edited 2 times in total | |
|  | | Plastikente
Sybarite
Posts : 373
Join date : 2012-11-15
Location : London
| | Subject: Re: DARK ELDAR UNIT GUIDE - Plastikente Mon Dec 10 2012, 23:38 | |
| PART ONE - GENERAL TACTICA More than any other army in 40k, the Dark Eldar are a glass hammer. You must hit the enemy first, on your own terms, and with overwhelming force, because you are too fragile to last if you don’t. Power from Pain. One of the unique advantages that the Dark Eldar bring is the Power from Pain special rule. Almost every unit in your list has this rule (only vehicles and non-DE miss out), which allows you to get more powerful as you destroy enemy (non-vehicle) units. It is always worth keeping an eye out for weak enemy to pick off, gaining those vital buffs for your units. Take particular note of the Sharing the Pain rules on p25 of the Codex. This basically allows independent characters to be used to move pain tokens around your army – a great way to make some of your fragile units a little tougher from the beginning. Fight on Your Own Terms. The Dark Eldar are fast, manoeuvrable, and have a lot of dirty tricks up their sleeves. They are also very fragile. The way to win with DE is to ensure that you only ever fight on your own terms. Block enemy lines of sight, gang up on parts of his line, only let him charge you when you want him to, and never let him shoot at you if you can possibly avoid it (tricky one, I know). To achieve this, there are some key weapons in your arsenal: - Night Vision. Almost every unit in your force has Night Vision – make the most of this advantage when Night Fighting is in force by sniping the enemy with no disadvantage whilst your own cover save is improved to 2+ at the right range.
- Fast Open-topped Transports. These give you the speed and manoeuvrability to relocate your foot-units, applying overwhelming force to limited portions of the enemy’s line.
- Fleet. Most of your units have Fleet. Linked with the transports, this gives you that bit more reach and reliability when charging the enemy. To get the best results from Fleet (statistically), you should keep 4+s and re-roll anything 1s, 2s and 3s. Doing this gives you an average charge range of 8.5”, falling to 7.318” if you charge through difficult terrain. Non-fleet units charge 7” on average, and only 5.542” through terrain.
- Strike from Cover. Overwatch hurts. Because your units are so fragile, even a couple of lucky hits will usually knock down one or two of your fighters. Because overwatch occurs before any models are moved, if you are in cover when you charge, you will get cover save against it (and stealth, if you are within 8” and have a Phantasm Grenade Launcher). As pointed out above, your Fleet units can still expect to make a 7” charge, even when leaping through the scenery.
- Two-turn Close Combat. This is the golden target to aim for with your assaults. If you wipe the enemy out with your charge then you will often be left in the open for his shooting to mop up. If you can get just the right balance to overrun him on the second round (in his turn) then you can consolidate ready to redeploy, hide, or (best of all) charge something new.
- Placing Terrain and Objectives Dark Eldar in the open are dead. Always ensure that there is sufficient terrain on the table to give you a fighting chance, including at least 2-3 sizeable pieces which you can obscure a Raider behind, if not hide it completely. Similarly, be intelligent when placing objectives. If you are planning an all-out rush, place as many objectives as possible in the opponent’s deployment zone. If you’ve got one sit-back-and-shoot squad, give it an objective in ruins to sit on in you deployment zone. [Taken to an extreme, these sort of tactics may be considered cheesy and/or lose you friends. Only you can be the judge of how far you want to push things. As the rules stand, placement of terrain and objectives are a part of the whole tactical experience and you are free to use them to your best advantage. I would expect nothing less of any under-handed, scheming Archon.]
- Winning Victory Points Dark Eldar don’t really have any units that are well suited to sitting and holding an objective (ie. scoring units which are tough with a good save or numerous enough to take casualties). Instead, you will probably need to play by swooping on objectives during the closing stages of the game. Keep a close eye on Victory Points and how to get more from turn 4 onwards, otherwise you may find yourself dominating most of the board but lacking the only thing which is actually vital to win!
Poisoned shooting. All Dark Eldar small arms used poisoned ammo. This is a real advantage against high toughness enemies. The big disadvantage is that these weapons have no effect on vehicles. Because of this, you need to give some real thought at the army selection phase to ensure that you have enough firepower to take out whatever you come across. Fortunately, the Dark Eldar have access to plenty of weapons which do cause big trouble for vehicles: - Darklight. Darklight weapons are awesome anti-vehicle weapons. Due to the lance special rule, every hit will have no worse than a 50% chance of doing something. Dark Lances are the longest-ranged AT weapon available to the Dark Eldar.
- Haywire For causing at least some damage, haywire is even more reliable than Dark Light. There is less chance of getting a penetrating hit (with that chance of a one-shot kill), but you can reliably stack up glances, and in 6e that means that the enemy vehicle will die eventually.
- Heat Lances Shorter-ranged than Dark Lances or Haywire Blasters (but not as short as Blast Pistols or Haywire Grenades), heat lances start to get really effective if you are willing to get in close, because under half range the melta effect kicks in, and their AP gives you a decent chance at getting a one-shot kill on your target.
If you want a bit more of a feel for the effectiveness of these options, have a look at the Mathhammer section later in this article. Don’t Walk. With very few exceptions, footslogging DE have had it. Low T and Sv mean that they can’t last out of cover, and can’t move very fast within it (even with Fleet). As a result, the vast majority of DE lists fall into one of two categories: - Raider Rush. In these lists, the majority of units will be embarked in Raiders or Venoms, giving them the speed and manoeuvrability to close with the enemy, where they can either assault or hose them down with rapid firing splinter weapons.
- Webway Portals (WWP). These lists will involve at least one character carrying a WWP, and a sizeable contingent held in reserve to enter via the portal once deployed. As it is no longer possible to assault out of a WWP in 6th Ed, these lists are no longer as powerful as they used to be, but can still be a viable method of getting nasty units close to the enemy without walking. If this tactic is the major focus of the list, 2 WWPs will reduce risk (otherwise a first turn kill might force all your reserves to arrive at your board edge). The WWP caddy will usually begin the game embarked in a transport to get him as far forward as possible in turn one to drop the portal in an advantageous position (ie one where units deploying from it can get some cover next turn and be ready to assault the turn after). Due to the deployment rules, the best you can manage is 6” move, 6” disembark and drop the portal just over the centreline. If you have 2 portals, the second caddy can wait a further turn to drop his well into the enemy deployment zone. For those interested in employing WWPs, you can find a great discussion of their uses in this thread.
Don’t buy too many toys. DE have access to a massive range of wargear. Resist the temptation to spend too many of your points on it. Because DE die so easily, 2 bodies with basic attacks are very often better than one body with super attacks; when that 1 person dies, he takes all his toys with him. BRING OUT THE MATHHAMMERI’m going to do a bit of number crunching here, which the unit specific posts will refer back to. I’ve looked at the effects of various weapons on different opponents. These are: - A standard Space Marine (MEQ)
- A standard Terminator (TEQ)
- A bog standard Imperial Guardsman (GEQ)
- My representative Monstrous Creature, WS5, T7, Sv3+(MC)
All fractions are given to 3 decimal places, and all stats include the rolls to hit, wound and armour saves to get the probability of 1 attack leading to 1 wound, unless noted otherwise. Shooting at people. The following table shows the chance a Kabalite Warrior has of inflicting a wound with 1 shot from the stated weapon. | Weapon | vs MEQ | vs TEQ | vs GEQ | vs MC | | Splinter Weapon | 0.111 | 0.056 | 0.333 | 0.111 | | Darklight Weapon | 0.556 | 0.370 | 0.556 | 0.444 |
Shooting at vehicles. The following table shows the chance of getting no effect/glancing hit/penetrating hit with 1 hit from the stated weapon (remember this does not factor in the roll to hit in the first place). | Weapon | AV10 | AV11 | AV12 | AV13 | AV14 | | Darklight | 0.167/0.167/0.667 | 0.333/0.167/0.500 | 0.500/0.167/0.333 | 0.500/0.167/0.333 | 0.500/0.167/0.333 | | Heat Lance (long range) | 0.500/0.167/0.333 | 0.667/0.167/01.67 | 0.833/0.167/- | 0.833/0.167/- | 0.833/0.167/- | | Heat Lance (melta range) | 0.083/0.083/0.833 | 0.167/0.111/0.722 | 0.278/0.139/0.583 | 0.278/0.139/0.583 | 0.278/0.139/0.583 | | Haywire | 0.167/0.667/0.167 | 0.167/0.667/0.167 | 0.167/0.667/0.167 | 0.167/0.667/0.167 | 0.167/0.667/0.167 |
The probability of getting a penetrating hit from any hit on an enemy vehicle is illustrated in the chart below:  If you manage to get a penetrating hit, then your chance of destroying the opposing vehicle is: | Weapon | Chance of destroying per penetrating hit | | Darkight | 0.333 | | Heat Lance | 0.500 | | Haywire | 0.167 |
Power Weapons. With the advent of 6th Edition, everyone suddenly got access to a range of power weapons, each suited to certain jobs. I have mathhammered the chances of a Sybarite/Hekatrix getting a wound from one attack with each weapon: | Weapon | vs MEQ | vs TEQ | vs GEQ | vs MC | | Power Sword | 0.167 | 0.028 | 0.333 | - | | Power Axe | 0.250 | 0.167 | 0.444 | 0.083 | | Power Maul | 0.111 | 0.056 | 0.556 | 0.028 | | Power Lance (charging) | 0.250 | 0.042 | 0.444 | 0.083 | | Power Lance (subsequent) | 0.056 | 0.028 | 0.333 | - |
From this breakdown, a power axe looks like the way forward, however “unwieldy” is a big disadvantage. As a rule, Dark Eldar live by striking first, because you are too weedy to take much incoming damage. That said, Haemonculi are unusual in that they have a bit more staying power (higher T and FnP), and their I isn’t that great anyway. For these characters, it can be well worth trading off the speed (they’ll hit last anyway against any decent CC model) to hit hard when you do hit. Power mauls are useful in their place, with an obvious downside when they meet power armour. I avoid them because there is a lot of MEQ in my local meta, but they are a good choice for beating through lightly armoured hordes. Power Lances have potential, allowing you to strike hard on the charge and punch through power armour. You lose power after that initial hit, but if you judge it right you can maim a squad in round 1, mop up in round 2 and be ready to charge someone new by your turn. The boring old power sword remains my personal favourite (I need to chop through MEQ every turn). This main disadvantage is your inability to take on T7+ (like my example MC), unless you can find some other way to buff your strength. As all power weapons cost the same, which one you take really comes down to a personal and modelling preference. Choose the one that suits you and convert your models to match it. Huskblades, Venom Blades and Agonisers. The usefulness of these weapons is a subject of much debate on the boards, so I thought I would devote a little time to the issue. Here are the wound probabilities for a Haemonculus making 1 attack with the stated weapon: | Weapon | vs MEQ | vs TEQ | vs GEQ | vs MC | | Huskblade | 0.167 | 0.111 | 0.333 | - | | Venom Blade | 0.139 | 0.069 | 0.370 | 0.139 | | Agoniser | 0.250 | 0.042 | 0.333 | 0.250 |
As is fairly obvious from the table, each weapon excels against 1 of my standardised foes. The debate comes because there is a big difference in price for these weapons, and opinions vary on whether the cost is worth the effect. Personally, I use all 3 weapons from time to time, and suggestions for where to use them are made in the unit specific articles which follow. Combat Drugs. A number of Dark Eldar units use combat drugs, the effects of which you roll for at the beginning of the game (see Dark Eldar Codex, p25). Of those available, 4 buff your combat ability (more on that later), one buffs your survivability (Splintermind), and one makes you a bit faster on foot (Hypex). Sadly, this last result is next to useless in 6e, as you can no longer run and charge, but it might give you that vital sprint to get some cover if there’s nothing to assault. To assess the value of the other drugs, I will make reference to the unit that makes most use of them: Wyches. The following table gives the chances of a Wych getting a wound with 1 attack made with a standard close combat weapon: | Drug | vs MEQ | vs TEQ | vs GEQ | vs MC | | No drugs | 0.056 | 0.028 | 0.222 | - | | Serpentin | 0.074 | 0.037 | 0.222 | - | | Grave Lotus | 0.083 | 0.042 | 0.296 | 0.028 | | Painbringer | 0.093 | 0.046 | 0.333 | - | | Adrenalight | 0.083 | 0.042 | 0.333 | - |
Notes:- I have decided to treat this as wounds per attack rather than wounds per Wych in order to allow direct comparison with the other stats I have provided elsewhere. In many ways, wounds per Wych is a more useful figure, and can be obtained by multiplying the results given here (except for Adrenalight –see the drug-specific note which follows).
- Serpentin doesn’t aid performance against Guardsmen as the Wyches were already at an advantage.
- Grave Lotus allows Wyches to at least have a chance of hurting T7+. It also gives less bonus to models with poisoned weapons, and none to those with Agonisers.
- Painbringer has no effect on models armed with Razorflails.
- Adrenalight adds extra attacks, so I have treated it in this table by adding 50% to the damage caused by a single attack. This represents the case of a standard Wych (not charging), which is when this drug has the greatest effect as a proportion of the attacks the model gets anyway.
So what? Well, if you value all-out killiness over other possible benefits of the combat drugs (such as FnP from that bonus Pain Token), then Painbringer is the result to pray for when you make your sacrifices to the dice gods (or cheat). This knowledge is also useful if you’re using Duke Sliscus (my HQ of choice) with his ability to influence the roll on the drugs table. Last off, a little something about being Fleet ... by choosing to re-roll the die if it comes up less than a certain number, you can reduce the probability of getting values equal or below that number, and increase the probability of getting values above that number. I ran the maths for the average D6 result when re-rolling anything below a 6, then below a 5, and so on. The results are illustrated on the table below: | Re-Roll | Expectation | | No re-roll | 3.500 | | 5 or less | 3.917 | | 4 or less | 4.167 | | 3 or less | 4.250 | | 2 or less | 4.167 | | 1s | 3.917 |
So any re-roll gives you a better run on average than no re-roll, but to get the best chances (statistically speaking), you should keep 4+s, and re-roll anything else. That’s actually fairly intuitive, but it’s nice to have the maths to back it up. Using this principle, I then drew a graph to show the probability of getting each distance when rolling to charge, doing so with Fleet, charging through difficult terrain, and doing that with Fleet. 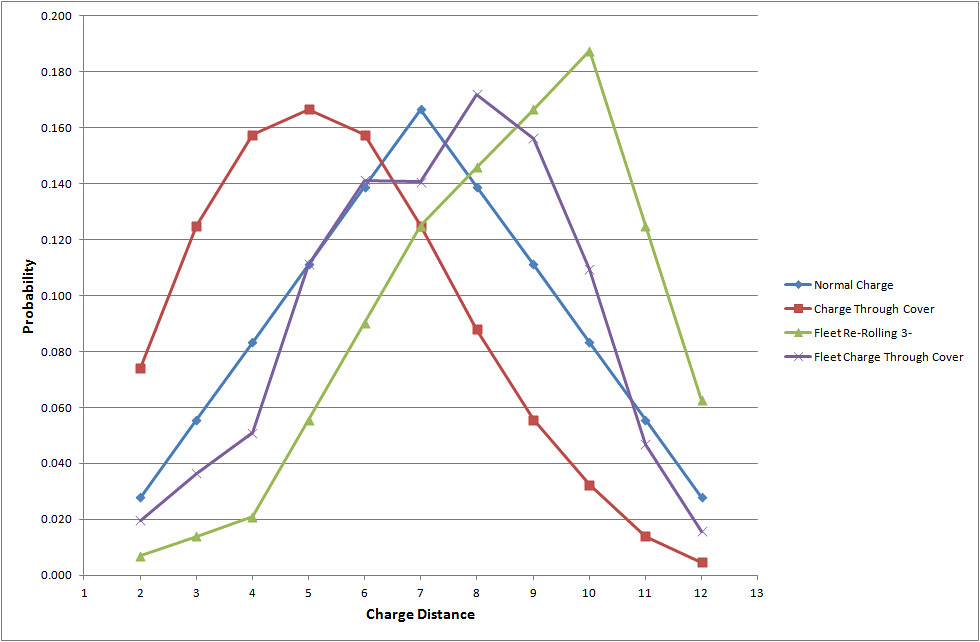 As you can see in each case there is a most likely result (the Modal Average), but there is also an average charge distance (the Mean Average, or Expectation), which is as follows: | Expectation | | Charge | 7” | | Charge through Terrain | 5.542” | | Fleet Charge | 8.5” | | Fleet Charge through Terrain | 7.318” |
I’m going to leave the discussion of the general principles for playing with Dark Eldar there; future articles will take a closer look at specific units. -Plastikente Acknowledgements... Many thanks to Nesbitt_bub1, who inspired me to have a crack at this and whose posts have informed a lot of the first draft. Thanks also to Mushkilla, Shadows Revenge, Ludo, Revener, Koval, Khira’lyth and FieryHammer for feedback and input which has influenced the final content of this article.
Last edited by Plastikente on Fri Dec 28 2012, 14:19; edited 2 times in total | |
| | | | Plastikente
Sybarite
Posts : 373
Join date : 2012-11-15
Location : London
| | Subject: Re: DARK ELDAR UNIT GUIDE - Plastikente Mon Dec 10 2012, 23:39 | |
| PART TWO - CORE UNITS CORE UNITSHQ and troops make up the core of any army, encompassing your Warlord and your key scoring units,which are actually going to win battles for you. Given the style of play required by Dark Eldar, I also consider our dedicated transports to be essential core units. HQ | ARCHON
Strengths: The strength of the Archon lies not in his statline, but in his Wargear: with the right pieces of kit, he becomes a near-unstoppable cc monster.
Weaknesses: Low T makes him vulnerable to instant death. Does not stand up well to shooting. |
Upgrades:- Venom Blade. A useful weapon for a bargain-basement Archon. Poison (2+) mitigates for his low S, and against TEQ it performs better than an Agoniser, for 1/4 of the cost.
- Blast Pistol. Very short range means that this pistol is rarely worth the points.
- Power Weapon. A useful cheap weapon to pair with a Soul Trap. See Part 1 of this series for a breakdown of the different power weapons and their uses.
- Blaster. A Blaster is a great alternative if you don’t want a close-combat Archon. With his massive BS he has a 0.889 chance of hitting with every shot, and that AP2 Lance is great for vehicles and armoured infantry alike. If you are willing to pay the price you could even give him this alongside a CC build, to make sure he doesn’t get stranded out on a flank somewhere – it’s not a cheap option though.
- Agoniser. Loses out to the Venom blade against TEQ, and for an extra 5 points you could take a Soul Trap/Power Weapon combo, which will soon out-do the Agoniser against everything else.
- Electro-corrosive Whip. A useful weapon for challenges and hunting monstrous creatures. Particularly once your Shadowfield shorts it’s very important to reduce the impact of incoming attacks. The big problem is getting that unsaved wound in the first place, as you will only be striking at your base strength.
- Huskblade. Instant death is useful, although there are many Eternal Warriors out there. The real strength of the huskblade is that it is the only piece of AP2 cc gear available to the Archon. Very expensive though.
- Haywire Grenades. A subject of some debate on the board. You pay 2.5 times as much as your troops do for these, and vehicles are not the target which Archons are best suited to take out. On the other hand, HWGs give you the flexibility to threaten them if you want to, and some think that this is well worth the cost.
- Ghostplate Armour. Not that useful – lots of stuff (including all power weapons) is AP4 or better, and the invulnerable save can’t be relied upon.
- Combat Drugs. A good chance of picking up some extra killiness or a pain token for your warlord at a bargain price. See the mathhammer in the general tactica article for more details of how drugs can help you out.
- Soul-trap. A beautiful piece of DE evil. Pick the right victims to start upping your strength and you will still be an absolute assassin in assault. Pair with a power weapon (cheap) or huskblade (expensive) and watch your enemies flee in terror [evil cackling]. However... there is a down side. You need to take out an IC or MC with your Archon to get the party started. This means he needs to be mobile and have a decent escort to enable him to survive to pick a fight. And if your enemy takes very few ICs and MCs (Imperial Guard?), then you’re soul-trap is just an expensive bauble.
- Djin Blade. A risky way of getting a couple of extra attacks, as there is a 1 in 6 chance that they will hit you! Personally, I find that chance already plays too much of a role with my Archon (waiting for the Shadowfield to short), so I would leave this at home.
- Clone Field. Can be good fun in a challenge, but won’t save you from shooting. I’d rather have the Shadowfield any day, even for the extra cost.
- Phantasm Grenade Launcher (PGL). Essential if you’re going to pair your Archon with a unit which doesn’t have plasma grenades (Incubi especially).
- Shadow Field. The must-have item for an Archon. Sure, it will blow eventually, but it is immensely frustrating for your enemy until it does, and will shield your Archon from all that S6+ instant death that is out there.
- Webway Portal. Specialist kit that is only worth taking if your list as a whole is built round it. Personally, I would leave Haemis to carry this, as they are less valuable when left sitting in the open after deploying the WWP.
How to use:Get the Archon into close combat, destroy the enemy, get him into another close combat. Repeat as required. An Archon should always be paired with a unit (until he charges, at least) to take some of the incoming fire. Some standard builds and pairing are: - Huskblade, Soul Trap, Shadowfield [135]. This build should decimate almost anything he comes across with high I, AP2 and an instant-death causing weapon. Try to find a lesser IC or MC to pick on first to boost your S before you take on the big foes.
- Power Weapon, Soul Trap, Shadowfield [115]. A slightly cut-price version of the above. Watch out for 2+ armour saves, as they will really slow you down.
- Venom Blade, Shadowfield [95].Just about the cheapest close combat Archon build. Useful for lightly-armoured hordes and high toughness enemies which your other troops may have trouble wounding. Add a Blaster if you like for a jack-of-all-trades.
- Blaster only [75]. Super-cheap Archon for a shooting force. Has no self-protection but is ideally suited to ride with your Blasterborn in a Venom and stay away from assault.
- With Incubi.A popular combo, provided that you invest in a PGL, which bumps up your price a bit more. Doing this lets the Incubi overcome their biggest weakness – charging units in cover. Targets must be picked carefully however, as power weapons make short work of Incubi.
- With Wyches/Bloodbrides.A good match-up, as the extra killing power of the Archon complements the Wyches’ survivability nicely.
- With Warriors/Trueborn. Not such an obvious match, as they tend to be a liability in an assault. Can be a useful ablative protection to soak up shooting attacks though, and to soften up an enemy with splinter fire before the Archon charges – just remember to separate him from the unit in the movement phase first!
- With Grotesques. Grotesques bring the great advantage of raising the majority toughness of the unit, giving you some genuine resistance to shooting attacks. They also start the game with a Pain Token, which the Archon can keep when he leaves. The downside is losing Fleet; this can be overcome by detaching the Archon to assault, but leaves the Grots at the mercy of their pitifully low leadership and the Berserk Rampage special rule. Grots are also bulky, limiting the size of unit you can fit in a transport, however, a large unit, led by an Archon and arriving from the Webway is going to seriously threaten anyone with striking distance of them.
COURT OF THE ARCHONThe Court is not a retinue – the associated Archon does not have to join the unit. Strengths: Er... some fairly good cc models Weaknesses: Not an outstanding unit in this Codex. Everything this unit does can be done just as well or better by something else in the army list. You have to take at least one of everything. Not everything in the unit has Power from Pain (but those which don’t get FnP anyway, and even Furious Charge in one case). Components:- Medusae. Basically a Kabalite Warrior with a variable S, variable AP flamer. A bit too random for my liking, but if the dice favour you it could be awesome.
- Ur-Ghul. Lots of attacks at an above average (for DE) S.
- Lhamaean. A Kabalite Warrior with better poison. Also gives the Archon better poison, but this will only affect his Splinter Pistol, so not that impressive.
- Sslyth. Almost the same statline as a Grotesque (minus 1W), but a Sslyth can shoot. Costs the same as a Grot, but doesn’t get Power from Pain. On the other hand, they do have Fleet and there is no risk of berserk rampage.
How to use: Just another close combat unit, with a bit of medium-close range shooting as it approaches. Taking 3 Sslyth and 1 of everything else would give you a majority toughness of 5 which is fun and unexpected for a DE army. By sacrificing the weaker squad members to gunfire you can make sure you keep that majority toughness for when it counts. Majority toughness also counts in assaults. Alternatively, maxing out on Medusae and adding a Haemi with Liquifier gives you a truly terrifying flamer squad of doom.  | SUCCUBUS
Strengths: Another close-combat monster. Fewer wargear options means that a Succubus should come in cheaper than an Archon. The dodge save adds to survivability in close combat without requiring a large points investment or risking shorting out. I8 makes her deadly for sweeping advances.
Weaknesses: Vulnerable to instant death and to shooting. No access to AP2 weapons (without sacrificing initiative advantage for a Power Axe). |
Upgrades:
- Venom Blade. See comments for the Archon, above.
- Blast Pistol. Again, see the Archon.
- Power Weapon. Without the option of a soul trap to buff this weapon you will get better results spending the extra 5 points for an Agoniser or ECW.
- Agoniser. A solid option for taking out MCs or ICs if their save is worse than 2+. Wounding on a fixed value can really screw with those units which are relying on their T for protection.
- Electro-corrosive Whip. The one to take to try to make sure you survive those high strength enemies. Can be a bit of a risk though for T5 and above, as you need to get that unsaved wound on your opponent before he lands a blow.
- Hydra Gauntlets, Shardnet and Impaler, Razorflails. These are best left to your rank and file Wyches, who will get (almost) as good an effect out of them and leave your Succubus to play with the toys that they can’t access.
- Haywire Grenades. See the Archon.
How to use: Similar to the Archon, although without access to an AP2 weapon so avoid those TEQs if they have the strength to instant-kill. If not, the dodge save makes her very survivable and great to tarpit. Succubus builds are very simple – choose one weapon and you’re done. Doing this will make any Succubus cheaper than an Archon with the mandatory Shadowfield, giving you almost as much clout for much less cost – ideal for smaller games. Standard unit pairings are: - With Incubi.The Succubus can’t have a PGL, so she can’t overcome the Incubi’s biggest weakness for them. Their AP2 weapons can cover a hole in her abilities, but it’s better to just keep her clear of 2+Sv altogether.
- With Warriors/Trueborn. Not generally a good choice – do little other than soak up incoming fire to make sure your Succubus gets into a fight.
- With Wracks. Their poisoned CCWs makes them a good pair for hunting MCs, the higher majority toughness will take a bit of the bite out of incoming attacks, and they start with a pain token. However the lack of Fleet or grenades makes it that much more difficult to land a decent charge in the first place.
- With Grotesques. All the same comments for the Archon/Grots pairing also apply. This unit can be utter filth, if fielded in large numbers, which pushes you towards the use of a WWP. Personally, I find the synergy presented by Wyches or Bloodbrides still makes them the stand-out choice to escort a Succubus:
- With Wyches/Bloodbrides. The ideal pairing. Everyone benefits from the same combat drugs, so you shouldn’t have trouble remembering them, and if you get that lucky 6 the unit starts out with 2 pain tokens! An ECW and Agoniser (on the Succubus and Hekatrix/Syren) make a great combo for taking out monstrous creatures. This gets even better with a few Shardnet/Impaler combos in the squad.
 | HAEMONCULUS
Up to 3 Haemonculi can be taken as a single HQ choice, up to 1 of which may be an ancient.
Strengths: Slightly tougher than the other DE characters, and brings a pain token with him. Access to arcane wargear. Makes Wracks a Troops choice.
Weaknesses: Poor save, weak in close combat due to low I, A. (Non-ancient) Haemis only have 2 wounds. |
Upgrades:Haemonculus Ancient. Has a useful Ld buff (standard Haemis have same Ld as a warrior), as well as higher A, W and I. Definitely worth paying for if this is going to be your warlord. Haemis have access to an absolutely massive range of wargear, allowing them to be tailored to achieve what you want. - Venom Blade. Cheap and cheerful. A solid choice.
- Stinger Pistol. Also cheap, but short range. Shooting Haemis have better options.
- Power Weapon. One unit that can take real advantage of a Power Axe. Coven units have plenty of poison anyway, so a bit of high strength AP2 complements them well, even if you strike last.
- Mindphase Gauntlet. This weapon has massive potential – even greater than the ECW. Problem is, this is undermined by the low (for a DE) initiative of the bearer. Even an Ancient won’t be hitting before a Smurf Captain, so the benefit of this weapon is lost. Against Guard, Necrons, Orks, etc this could be awesome.
- Flesh Gauntlet. A poisoned weapon which causes instant death. Quite expensive for what it does.
- Agoniser. Same comments apply as for Succubus.
- Electrocorrosive Whip. Suffers from the same problems as the mindphase gauntlet, costs twice as much and only halves the enemy’s strength instead of stopping him from attacking outright. It is a power weapon, but I would just take the Mindphase Gauntlet instead.
- Huskblade. A potent but expensive weapon. If you’re going to buy one, stick it on an Archon, who has the WS, I and A to make it worth it.
- Animus Vitae. This is a CCW, but the wording in the codex (p60) does not talk about wounds inflicted using the Animus Vitae, just wounds inflicted “by the bearer”. This seems to leave the door open to whacking the enemy with your power axe and then claiming a token with the AV. Your opponent may dispute this though, given that p51 of the BDB states you “cannot mix and match the abilities of several different Melee Weapons.”
- Casket of Flensing. A one-shot gambler’s weapon. If the dice favour you it could be awesome. They never seem to favour me with this particular toy.
- Liquifier Gun. One of the best options available for a Haemi. Useful for softening up enemies in cover and for putting off chargers (due to overwatch rules). It’s great to see the look on an MEQ player’s face when you roll that 1, 2 or 3 for the AP.
- Soul Trap. Like a Huskblade, this is better given to someone who has the stats to really make use of it.
- Vexator Mask. Can be fun, but even Guardsmen are more likely to pass than fail, so it can’t be relied upon to stop incoming attacks, especially from truly dangerous foes. Backing up with a vehicle with Torment Grenade Launcher will improve your success rate.
- Scissorhand. Mathhammer says that this slightly beats a Venom Blade for a Haemi, but gives equal wound output for an Ancient. It costs 3x as much. I know which I would choose.
- Archangel of Pain. One-shot I/WS crippler. Variable range and relies on the enemy failing a Ld test. Not reliable enough for my taste, especially as we will usually have the I advantage and often have the WS advantage without it.
- Hexrifle.
| Weapon | vs MEQ | vs TEQ | vs GEQ | vs MC | | Splinter Weapon | 0.111 | 0.056 | 0.333 | 0.111 | | Hexrifle | 0.185 | 0.111 | 0.333 | 0.185 |
The Hexrifle gives slightly better effect than a splinter rifle shot (I know Haemis can’t take a Splinter Rifle, but this is for comparison). But you only get one shot. So on average you should wound 1 Space Marine every 5.4 turns (the odds are slightly better for an ancient). If you do get that wound, it is pinning and gives a chance of insta-killing ICs and MCs, but the wound rate is so low that you can’t really build tactics around this fact. Oh, and it’s a sniper weapon, so sometimes you can choose where to allocate your hits in a squad. But the Haemi is a character, so you could do that anyway.
Hexrifles can have their uses though. For example you can pair the Haemi with some allied Eldar Pathfinders, take a 6” Scout move, followed by your own move and drop a WWP as far onto the board as if you’d been in a vehicle. Or you could pair him with some Wracks with a Hexrifle Acothyst, in order to lay down some more shots and have more chance of making use of the weapon’s special rules.
- Shattershard. A true gem, this one-shot weapon works against almost everything. Find some MEQ Elites to unleash on and they will fail on a 5+, giving you a good chance of making your points back.
- Crucible of Malediction. A premium weapon against the right opponent. Not reliable for hunting a single Psyker, but if the enemy has brought lots (Seer Councils? Grey Knights?) then they are bound to fail at least a few of the saves and curse you for it. Once again, pair with Torment Grenade Launchers for maximum effect.
- Orb of Despair. A one-shot small blast – this can quite easily scatter enough to have no effect. Additionally, there are very few models it can cause instant death to, although that is at AP1. I would leave it at home in favour of a Shattershard or Dark Gate.
- Dark Gate. A one-shot large blast – a longer range than the Orb of Despair, lower risk of missing everything and may cause instant death, although AP is -.
- Webway Portal. Haemis make ideal WWP caddies. They are more expendable than an Archon so can be dropped off with the portal and then left to wander towards the enemy if they survive the next turn. Alternatively, they can join one of your newly arrived reserves, bringing a pain token with them.
How to use: You need to start by deciding what the purpose of your Haemi is, then give him the Wargear and supporting unit to go with it.
- WWP Caddies. Give your Haemi a WWP and stick him on a transport. He wants to deploy the portal as close to the enemy as possible, and on the first turn. Venoms make the ideal transport to do this as they are smaller (=easier to hide) than a Raider and come with a free Flicker Field. Wracks make a perfect escort for the Haemi as they match his toughness and can be taken in small enough units to fit with him in the Venom. As this Haemi is rushing towards the enemy anyway, he is an ideal candidate to carry a Shattershard, Crucible of Malediction or other exciting close-range toy.
- Pain Token Caddies. Run the Haemi with Incubi or Wyches/Bloodbrides. When they disembark ready to assault, separate him from his escort, giving them his pain token – this way he doesn’t stop them from getting Fleet. After they have made their charge he can always try to catch up with them – a Venom Blade is a cheap way to give him some bite if he does make it. Again, as this Haemi is going to be in the midst of the enemy he is a great carrier for a short-range, single-shot toy.
- Shooting Specialisation. Take a Hexrifle or Liquifier Gun and join up with a group of Kabalite Warriors/Trueborn. They can then either sit in good cover backed up by FnP, or fly around the battlefield in a transport to cause some close-range damage.
- Close Combat Specialisation. The Mindphase Gauntlet is great fun against a low I army, otherwise a few S5, AP2 axes are a great bonus to any Dark Eldar assault. Otherwise you can always just grab a Venom Blade.
DEDICATED TRANSPORTSTransports are a key option in most DE unit builds, so I will deal with them here before moving on to the units themselves. 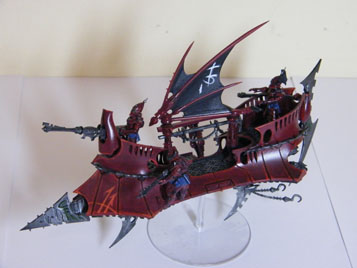 | RAIDER
Strengths: Largest (non-Forgeworld) transport available to DE. Single turn reach of 30” if moving Flat Out. Open-topped allows passengers to assault on the turn they disembark. Mounts a heavy weapon.
Weaknesses: Paper-thin armour. |
Upgrades:
- Dark Lance/Disintegrator Cannon. Not actually an upgrade, but a compulsory option. The vast majority of players choose Dark Lances to boost the anti-vehicle capabilities of their army. A Disintegrator could be a viable option if AV was well-covered by the rest of your list, or you knew you would be facing a lot of 2+Sv models (Deathwing army?).
- Shock Prow. If you tank shock an enemy squad they are probably just going to assault you in their next turn, however in the end game that might be your only option to force them out of your deployment zone or off an objective. If you consider using your Raider to ram then you will most likely pen yourself, and that may well be the end of you, but again in a desperate situation this might be a worthwhile risk to take.
- Torment Grenade Launchers. The short range of this item puts you at risk of being assaulted if you try to use it, but the Ld penalty it provides for your enemy could be pivotal for certain Arcane Wargear available to Haemis. Worth giving a try in this sort of setup.
- Enhanced Aethersails. These can be used in addition to going Flat Out (6th Ed FAQ v1.1), giving an average of 7” extra movement. I find my Raiders fast enough anyway, but this could be useful for getting those non-Fleet passengers a little closer to the enemy, especially when entering from reserve, or playing from a hammer and anvil deployment.
- Retrofire Jets. I don’t see much value to this. The speed of a Raider means that you can get to almost anywhere on the board by Turn 2 anyway, without the risk of your Reserves roll missing or getting a Deep Strike mishap. Equally, if you’re going to start in reserve, Enhanced Aethersails will let you get almost anywhere on the board with less risk and more precision.
- Grisly Trophies. I have never made use of these, but if you have the spare points there are a useful way to make sure your Wyches stand and fight if you have a bad turn in combat.
- Chain Snares. I have a fondness from these left over from their rules in the last Codex. However, they can only be used in the movement phase, and therefore not during the Flat Out section of your movement in the shooting phase. It is very difficult to get an enemy unit into a position where you can use this on them without them assaulting you first. I’d leave them at home.
- Venom Blades. As these don’t take effect until the enemy rolls to hit, they’re not going to stop anyone from assaulting your vehicles – they just may take down someone as they go. Not worth it IMHO.
- Splinter Racks. A cheap way to buff your Warrior’s shooting, increasing their hit possibility from 0.67 per shot to 0.89. A useful buy for Warrior Gunboats, but be aware that it won’t work on Shardcarbines or Splinter Cannons.
- Night Shields. These often won’t put you out of range of enemy anti-tank weapons (not if you want to be in range to fire yourself), but can be really helpful to protect your Raider in close by reducing the range at which the enemy can Rapid Fire at it or claim the Melta bonus. Definitely worth the points if you’re planning to drop assault troops off and hang around.
- Flicker Field. Due to the Jink rule, Raiders get an equivalent save for free, provided that they have moved. However, the jink cover save won’t protect them in assault, or if the enemy gets the first turn and shoots before you can move. It can therefore be a worthwhile investment for your VIP Raider.
How to use: Mobility is a key advantage of the Dark Eldar and Raiders play a vital part in getting your troops to the right place at the right time. As a Dedicated Transport, they have to be taken in support of a unit, and should be kitted out to benefit that unit. With low armour and open-topped, your Raiders are very unlikely to survive a game, so avoid over-spending on them. Personally, I never give them more than one upgrade, in an attempt to keep them expendable. Once they have fulfilled their primary role of delivering units to where you want them, you can then start using them for other functions. At this point, the main things to do are block enemy movement or screen your own fragile troops by getting in the way. If you sit on an objective that’s been left in the open you may be able to tempt your opponent into wrecking or exploding you, leaving a nice piece of area terrain behind. 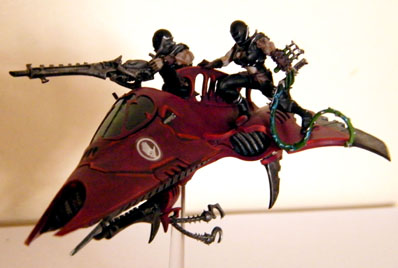 | VENOM
Strengths: Single turn reach of 30” if moving Flat Out. Open-topped allows passengers to assault on the turn they disembark. Potential for impressive anti-personnel firepower. Smaller than a Raider, making it easier to hide behind scenery.
Weaknesses: Even flimsier than a Raider, although it comes with a free Flicker Field. Small transport capacity. Smaller range of available wargear. |
Upgrades:
- Second Splinter Cannon. For a small cost, this almost doubles the Venom’s shooting output, making it a fearsome little anti-infantry Gunboat. I take this upgrade every time.
- Retrofire Jets, Chain-Snares, Grisly Trophies, Envenomed Blades, Night Shields. Exactly the same comments apply as for a Raider.
How to use: See comments on the Raider. As the Venom has such a low transport capacity it will often be used to carry elite units or ICs. I generally go flat out in my first turn to get the passengers to where they need to be, and then slow down to pump out as much fire as possible before the Venom is taken out. Also, because the Venom has a Flicker field, use it to screen your Raiders during deployment, in order to give them a cover save. TROOPSTroops are the backbone of an army, and usually the only scoring units. 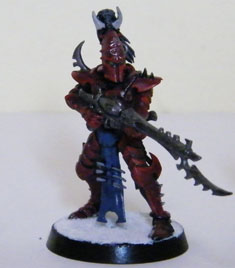 | KABALITE WARRIORS
Strengths: Above average WS, BS and Ld. High I. Poisoned shooting weapons as standard and can take special/heavy weapons for more anti-infantry or anti-armour.
Weaknesses: Fragile – average toughness and poor armour. Rapid fire weapons cannot shoot and assault, but Warriors are not good assault troops in any case. |
Upgrades:
- Sybarite. For about the cost of another warrior, you can upgrade one to a Sybarite. His Ld is higher, making the squad more likely to stick around. He is also a character, giving the option for precision shots, and the ability to make/accept challenges in cc. For these reasons, a Sybarite is well worth it, but if points are tight you can get away without one.
- Sybarite Wargear. Ghostplate armour doesn’t make a great difference, and points are probably better spent elsewhere. Blast pistols are very expensive and the range is so short that they aren’t that useful. Warriors will never survive an assault from decent assault troops, so I usually leave my Sybarite with his Splinter Rifle. If you want to make a unit to sit in cover and maybe survive an assault (if the dice are with you), a PGL and Venom Blade may work but it’s a large points investment for an uncertain outcome.
- Blaster. A really mean gun for giving a squad a bit more bite. Has a reasonable range at high strength and low AP. Gives your squad a chance against vehicles and heavy infantry (MEQ/TEQ). As the restriction is one per squad, you can use it in squads which are too small for a heavy weapon.
- Shredder. Some high S anti-infantry to buff the squad, although it is AP-. The short range ruins this weapon for me, and you have to choose between this and a Blaster.
- Dark Lance. A long range Blaster but it is a heavy weapon, reducing your mobility. You need a minimum squad size of 10 to take one. This gives the squad some long ranged AT capability, but if you choose to do this you’ll sacrifice all your splinter fire for the turn. Can be useful to give a static squad something to do until the infantry get into range.
- Splinter Cannon. A great supplement for a dedicated anti-infantry squad. Can be fired as a heavy or assault weapon, so it doesn’t need to reduce your mobility.
- Venom. Only a min-sized squad can take a Venom. This can make for a useful harassing unit which is also scoring (once disembarked). Both the vehicle and the passengers are very fragile, though.
- Raider. A good option for a gunboat. Buy a splinter rack and fill up with Warriors. Due to the transport capacity, if you want an IC to ride too, the Warrior squad has to be too small to take a heavy weapon, which is a disadvantage. Obvious point – don’t stick a Dark Lance in a Raider, as you’ll only get to snap fire if you want to take advantage of the mobility.
How to use: Warriors could deploy from a WWP and as they are a shooting unit they won’t be so disadvantaged by the fact they can’t charge. You need to make sure that they can deploy into cover though, and avoid leaving them open to a charge in the enemy’s turn. A few possible non-WWP builds are:
- Venom Warriors. 5 Kabalite Warriors, Blaster, Venom, extra Splinter Cannon [125]. Small harassing unit, as discussed. Sybarite left out for cheapness, but Blaster gives the option for some opportunistic tank-hunting.
- Raider Warriors. 10 Kabalite Warriors, Blaster, Splinter Cannon, Raider, Splinter Racks [195]. Anti-infantry gunboat. The Sybarite gives them more staying power when they start to take casualties and the Blaster again gives an anti-tank option.
- Static Warriors. 20 Kabalite Warriors, 2 Dark Lances, Sybarite with Venom Blade, Phantasm Grenade Launcher [265]. A big unit designed to sit in decent cover holding an objective. Dark Lances let the squad deal with vehicles until the infantry get in range. Supplement with a Haemonculus to make this unit even tougher to shift.
Warriors are the only DE unit which is suited at all to sitting on an objective, due to their ranged weaponry (although Wracks can be very survivable, especially if they go to ground, I don’t consider them “suited” because they have no offensive effect in this role). Even in decent cover they are not that survivable, and going to ground may be your only option to make it to the end of a turn. Weigh the risks and remember that Victory Points are how you win games, not necessarily kills. 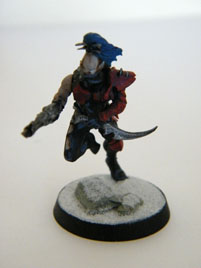 | WYCHES
Strengths: Above average WS, BS and Ld. Very high I means they will almost always strike first, even against elite assault troops from other armies. Combat drugs help them to achieve more than their statline would have you expect (see the mathhammer section of the general tactica). Dodge save makes them very durable in close combat. Come with assault grenades and can be upgraded with haywire grenades to take out vehicles. An outstanding tarpit unit.
Weaknesses: Very fragile – average toughness and even poorer armour than Warriors. Will be shot to pieces if left in the open (and watch out for overwatch!). Wyches have no significant ranged firepower. |
Upgrades:Each of the 3 Wych weapons costs the same as an extra Wych, so the question is always, “why not just have a larger squad?” More bodies means that you can take more damage, adding to your overall survivability. If you’re already maxed on size though, weapons can still give you a bit more bite.
- Razorflails. Give a slightly better damage expectation than just doubling your number of attacks (by adding another Wych), but don’t stand out so much if you roll Painbringer for your combat drug.
- Hydra Gauntlets. A standard Wych gets 2 attacks (when not on the charge or buffed by combat drugs). One with Hydra Gauntlets gets an average of 4.5 attacks, giving a slightly better return than just buying an extra Wych for the same cost. They do bring an extra element of randomness though...
- Shardnet and Impaler. No effect against enemies with 1 attack, and can’t be used to assist characters in challenges, but these are absolutely great for hindering monstrous creatures, or for general tarpitting, especially if used in multiples. The one weapon whose effect can’t be simulated by just adding more Wyches.
Apart from the Wych weapons, there are a couple of other options to upgrade your squad: - Haywire Grenades. Awesome for vehicle hunting. Just watch out that you don’t get left in the open and shot up after you’ve taken out your target.
- Hekatrix. Higher Ld and all the bonuses of being a character – definitely worth the investment for an assault. Also brings some useful weapons to the mix. Don’t bother with a Blast Pistol. For 3+ or worse save, Agoniser gives best results above T4, power sword below. For 2+ save, Venom Blade is the way forward. I like to stick to VB in any case, for a cheap and cheerful option. Phantasm Grenade Launcher is useful for the stealth effect defensive grenades give you at close range. It’s also much cheaper this way than taking one on an HQ; take one if you have points to spare.
How to use: Wyches were born for close combat! Get them there and watch them enjoy it. Their dodge save makes them very survivable in an assault, allowing them to roll over weaker units (GEQ) or be a massive tarpit for tougher units (MEQ), who they will have more trouble finishing off. A pain token goes a long way to improving Wych survivability, and it is often worth pairing them with a Haemi at the off to get this. Wyches will also often play escort to an IC. Wyches cannot survive on foot (even with a pain token), so you are bound to want to give them some sort of shortcut to close combat:
- Go tank-hunting in a Venom. A min-sized Wych squad has no redundancy. A bit of lucky overwatch or an exploding vehicle can easily reduce the squad below an effective size for an assault. That said, 5 Wyches with HWG in a Venom is a real threat to any vehicle they come across; remember to throw one grenade as you approach and laugh because vehicles can’t overwatch.
- Raider. 7-8 Wyches, Shardnet and Impaler, including Hekatrix with Venom Blade, Raider, Night Shields [155-165] + Independent Character. Start the Wyches with a Haemi to get the pain token (and then leave him in the transport to do drive-bys with a Liquifier Gun
 ), or use them as an escort for your Archon/Succubus. 1 Turn of flat out in the Raider should get you in striking distance, and hopefully your jink save and Night Shields will save you from a painful explosion for that 1 turn at close range. This size of squad is usually sufficient to achieve the 2-turn kill, but you might consider increasing the squad size if this doesn’t work for you. ), or use them as an escort for your Archon/Succubus. 1 Turn of flat out in the Raider should get you in striking distance, and hopefully your jink save and Night Shields will save you from a painful explosion for that 1 turn at close range. This size of squad is usually sufficient to achieve the 2-turn kill, but you might consider increasing the squad size if this doesn’t work for you.
- Webway Portal. 15 Wyches, Hekatrix with Venom Blade, Phantasm Grenade Launcher [175] + Haemonculus. Squad size is maxed to add some survivability, which is also the reason for the Haemi. Deploy from the portal into cover and try to get an assault on the next turn. PGL will protect a bit from any really close-ranged fire, and if the enemy manage to get the jump on you by assaulting first.
Some other ways to customise your squad for a certain role are:
- Monstrous Creature Hunters. Max out on Shardnet/Impalers and take a Hekatrix with Agoniser.
- Vehicle Hunters. Haywire Grenades. If possible, perhaps risk a disordered charge against an enemy squad and adjacent vehicle – this keeps you from being stuck out in the open whether or not you take the vehicle out.
Wyches are an offensive unit – do not use them to try to hold objectives, only to swoop in the end game. Hiding in cover and sniping with splinter pistols is not an effective way to use these troops. WRACKS AND HELLIONSBoth of these units have the potential to be taken is troops if you select the right HQ choice. Nevertheless, I will deal with them in the Elites and Fast Attack sections respectively. -Plastikente Acknowledgements... Many thanks to Nesbitt_bub1, who inspired me to have a crack at this and whose posts have informed a lot of the first draft. Thanks also to Mushkilla, Shadows Revenge, Orthien, Murkglow, Thor665, Squierboy, Ludo, Revener, Koval, FieryHammer for feedback and input which has influenced the final content of this article.
Last edited by Plastikente on Fri Dec 28 2012, 21:27; edited 2 times in total | |
| | | | Plastikente
Sybarite
Posts : 373
Join date : 2012-11-15
Location : London
| | Subject: Re: DARK ELDAR UNIT GUIDE - Plastikente Mon Dec 10 2012, 23:39 | |
| PART THREE - ELITES Elites are the specialists who add punch to your army. Generally they are suited to destroying a particular type of enemy but don’t shine against other targets. Elites are not scoring units, so they are usually not game winners in their own right, but rather facilitators who clear the way for and protect your troops. WRACKSStrengths: Poisoned CCWs. Tough (for Dark Eldar). Start with a Pain Token. Can be troops and therefore scoring. In this case, they become the smallest, cheapest scoring unit available to DE. Weaknesses: Very poor save. Very limited access to shooting weapons. No grenades. Not Fleet. Upgrades: Liquifier guns are awesome – a flamer template with a 50% chance of melting straight through power armour every time it fires. I always max out on this upgrade. An Acothyst is a fairly standard character upgrade, with the associated Ld buff, and ability to make precision strikes and make/accept challenges. The wargear available to an acothyst has all been covered in my description of Haemis. The high-end weapons essentially double the cost of the Acothyst, and he doesn’t have the I to take full advantage of them so I just stick to the cheap and cheerful Venom Blade. A Hexrifle can also be useful for picking out opponents with a chance of insta-killing any character or MC you are lucky enough to wound. How to use:| Model | vs MEQ | vs TEQ | vs GEQ | vs MC | | Undrugged Wych | 0.056 | 0.028 | 0.222 | - | | Wrack | 0.083 | 0.042 | 0.333 | 0.083 |
Like Wyches, Wracks need to be in combat to achieve much; in fact, Wracks can achieve almost nothing at a range greater than “template”. Unlike Wyches, Wracks love a tough opponent, giving them a better kill rate against SMurfs than a Wych without drugs and making them ideal for hunting Plague Marines, Wraithguard, Monstrous Creatures etc. The free pain token helps their survivability, and is very much needed as they only have thick skin for armour. Once they get a second pain taken, Wracks will be re-rolling to wound Space Marines and Orks on the turn they charge. As Wracks start out with a fairly mediocre I and an above average T, it is not ridiculous for this unit to charge enemies in cover, as they don’t lose a great deal compared to their normal abilities. Wracks can make a useful escort for an IC, allowing him to start the game with a pain token. Beware the fact that they are not Fleet though, and they become very fragile if the IC separates and takes their pain token with him. Unless deploying from a WWP, Wracks need a transport to get them to their target. 5 in a Venom or 10 in a Raider are both effective builds. In comparison to the other Elites available in the list, Wracks are a pretty mediocre unit. In comparison to our troops, however, they offer unique and excellent abilities. It’s probably not worth taking these unless you have a Haemi in one of your HQ slots. INCUBIStrengths: Best armour save available to DE. AP2 weapons, high weapon skill, above average attacks, standard DE high initiative. Incubi demolish MEQ in an assault. Weaknesses: No grenades! If you assault someone in cover you lose your major advantage of striking first. Incubi have the standard DE toughness, which makes them vulnerable to shooting and strong cc attacks, even with that save. They also have a tendency to become victims of their own success, wiping out the first unit they charge only to be left stranded in the open where the enemy shoots them to pieces. Upgrades: Apart from a dedicated transport, the only upgrade available to Incubi is to take a Klaivex and tool him up. If you aren’t using the Incubi as escorts for an IC then a Klaivex is worth taking for the Ld upgrade alone - Incubi are so expensive you really don’t want to see them bravely running away if they botch a combat. Characters also have the benefit of precision strikes and issuing/receiving challenges. This can be useful when escorting an IC, either to protect your Archon from a killer opponent, or equally to stop him wasting his time stamping on a squad sergeant. Beware challenges though, unless you are certain that you can take your opponent down in one round. Most characters have access to power weapons, which stand a good chance of finishing you if they can land a blow. A further advantage of the Klaivex is that he strikes at a different initiative to the squad. As wounds are allocated at each initiative step, this fact can be used to snipe particular models if you can get him in base-to-base with them. Options for a Klaivex are:
- Demiklaives. An expensive weapon that just doesn’t quite pay for itself. Statistically, the strength increase always performs at least as well as the attacks increase (against any T>2). You get an increase in killiness of about 30% for a cost increase of over 50%. Probably not worth it, unless you are trying to kit your Klaivex out as a challenge assassin, but even then, an Archon or Succubus would be better suited.
- Bloodstone. Good for thinning out enemies in power armour before you assault. Beware killing too many of them, or your charge might fail, but the range of a template is so small that this is unlikely to be a major issue.
- Onslaught. A squad of 5 Incubi including a Klaivex with this power will generate on extra 1-2 attacks on average. For only a few more points you could just add an extra Incubus and have those extra attacks guaranteed.
- Murderous Assault. In 6e it is not possible to target an IC specifically unless he is challenged or not in a squad, this power is really only useful then if you want to try to kit out your Incubi as a challenge assassin.
How to use: A squad of 5 Incubi is generally more than enough to take on any enemy, but be careful who you charge. Unless you pair the squad with an Archon with PGL, you need to avoid opponents in cover, and avoid taking on troops with power weapons unless you are sure you can wipe them out before they strike back. Overkill is always a risk with Incubi, so try to pick combats where you will not be left right out in the open if you wipe out you opponent. Like other DE troops, Incubi on foot don’t last. Venoms have the advantage of being smaller and having the free flicker field (in case your opponent gets the first turn), Raiders have the extra hull point which lets them take a bit more flak – either option can work. Some suggested Incubi builds:
- IC escorts. 4 Incubi, Transport [153]. Add an IC and go looking for trouble. An Archon is the only option to bring along a Phantasm Grenade Launcher so that you can hunt enemies in cover. A Huskblade, Soul Trap and Shadowfield provide a good AP2 match to the Incubi, but this makes him a real points sink.
- Standalone Incubi. 5 Incubi including Klaivex, Transport [185]. Use your mobility to find an exposed squad in power armour to pick on. Night Shields will help the ride get in close if you have the points, or you could take Grisly Trophies to try to make sure you stick around, or Torment Grenade Launchers to make sure that the enemy doesn’t.
GROTESQUESStrengths: Strongest and Toughest infantry in the DE list, with plenty of attacks and wounds. Grots are practically monstrous creatures. Start with a pain token. Weaknesses: Must be escorted by an IC, and if he dies, they’re in trouble... Upgrades: Take a Liquifier Gun. They’re well worth the points, and your Grots will be getting in close anyway. An Aberration brings an extra attack and the advantages of being a character who can accept challenges to save the escorted IC if you want. The Aberration’s weapon options are all covered in the section on Haemis, with the same comments applying, with the addition of this: the Aberration has a high strength, so all of the poisoned options will be re-rolling failed wounds against most opponents. This makes the Flesh Gauntlet particularly terrifying, as it also causes Instant Death, cutting straight through FnP. Also note that the Aberration does takes a weapon, not an upgrade – so he also gets an extra attack for having 2 ccws. How to use: Grots have a miniscule leadership and suffer from the Berserk Rampage special rule. For these reasons, you will always want to accompany them with an Independent Character. Fortunately, they are close combat monsters, making them ideal escorts for an Archon or Succubus (with the one small downside being that they are not Fleet). If you are going to take Urien Rakarth, it is well worth paying the extra points to upgrade your Grots’ strength. Due to his other special rules, if you start them with him you can have 3 Pain Tokens from the start of the game, meaning you won’t get pinned and giving you a high enough strength to threaten most vehicles. Because Grots are bulky, they will not fit in a Venom, leaving essentially 2 viable unit builds:
- Raider Grots. 4 Grots, Liquifier Gun, Aberration with Venom Blade, Raider [225] +IC. The maximum number you can fit in a Raider to escort your character. Night Shields and Torment Grenade Launchers are good complementary upgrades for this Raider if you have the points.
- WWP Grots. 6 Grots, Liquifier Gun, Aberration with Venom Blade [235] +IC. A very similar price to the Raider squad, but with more hitting power. The high toughness and wounds should allow you to weather the inevitable mass fire you will draw. This squad should stomp all over anything you get it into contact with (except vehicles!). You could push the squad up to max numbers [375 pts!], but you are probably already going to overkill any squad you are in combat with. I have called this build “WWP Grots”, but the unit better suited to delivering the portal (protecting the caddy with their high toughness) than to stepping out of the Webway and laying the smack down (due to the lost turn when they can’t assault).
MANDRAKESStrengths: They look nice ... that’s about it. Well, they do have Infiltrate and Move Through Cover as well. Weaknesses: No grenades. Poor save, even if it is invulnerable. Can’t shoot until they get a pain token. May be slightly stronger than the average DE, but only have standard ccws to hit people with. Upgrades: Only upgrade is a Nightfiend, giving the standard Ld buff and the advantages of being a character. How to use: Mandrakes are not a great option in a competitive area of the Force Organisation Chart. They do not hit as hard as Incubi (or even Wyches, in most cases). They don’t shoot as well as Trueborn, and can’t shoot until you’ve got that vital pain token. They can outflank, but if you do so they can’t do anything on the turn they arrive unless you’ve paired them with a Haemi to let them shoot. Same goes if you bring them on from a WWP. Despite their invulnerable save, they are about as fragile as all Dark Eldar. Against the right opponent, Mandrakes can hold their own (low T, poor assaulters with good saves – think Tau, IG, Gretchin...). Because of stealth, they are also quite resilient in cover. They can work nicely when paired with a Cronos to help them get that first pain token. If you are going to take them, take a large unit (8-10), but don’t expect too much of them – they are not a strong choice in our list. HARLEQUINSStrengths: High WS, access to rending weapons, ignore difficult terrain, can hit and run. Weaknesses: Expensive, fragile, have to pay extra for grenades, don’t get power from pain. Upgrades:
- Harlequin’s Kiss. For a few points, you can make your attacks rending. This is well worth it against almost all opponents, but makes your Harlie cost as much as an Incubus. If you’re going to take these, it’s probably worth leaving a few models without. You are bound to lose 1 or 2 Harlies to shooting before you get to your target, so position these cheaper Kiss-less models to take the fall.
- Fusion Pistol. Like the Blast Pistol, you have to get very close to use this, so you’re unlikely to make a good return on your points investment.
- Shadowseer. Expensive, but almost essential. Stealth and shrouded (from the Veil of Tears, see FAQ v1.1, page 2, left column) do a lot to mitigate for your fragility as long as you’re in cover. And the Hallucinogen Grenades allow you to assault through difficult terrain without being hacked apart before you can strike. (Although Harlequins ignore difficult terrain, they still strike at I1 if they charge through it without grenades. See FAQ v1a, page 3, right column.) Beware precision shots/strikes though. The Shadowseer is a real force-multiplier and your opponent will want to take him out asap.
- Death Jester. Carries a shuriken cannon which pins, but sacrifices his extra cc attack (from 2 weapons) to do so. Not essential, but can deliver a useful effect. Unlike splinter weapons, the Shrieker Cannon can damage light vehicles.
- Troupe Master. Standard character buff. You probably don’t need the extra A and Ld, but a power weapon in the squad could come in handy, particularly if you give him a power lance to use during his furious charge. Also, his ability to precision strike is very useful for taking out sergeants/special weapons before they can cause you damage.
Note: Shadowseers, Death Jesters and Troupe Masters are all characters, benefiting from precision shot/strike, and all the other bonuses that go with it. Don’t forget Look Out Sir! to keep your Shadowseer alive, and use the other characters to keep him out of challenges too. How to use: The following table compares Harlequins with a few of our other cc specialists. These stats are worked out for individual models on the charge. Harlequins do significantly worse in subsequent rounds, because they lose the advantage of their furious charge. | Model | vs MEQ | vs TEQ | vs GEQ | vs MC | | Harlequin | 0.444 | 0.222 | 1.185 | 0.111 | | Harlequin with Kiss | 0.741 | 0.444 | 1.333 | 0.333 | | Incubus | 1.000 | 0.667 | 1.333 | 0.250 | | Bloodbride (no drugs) | 0.222 | 0.111 | 0.889 | - | | Wrack | 0.250 | 0.125 | 1.000 | 0.250 |
The problem with Harlequins is that, without a kiss, they lack bite against armoured opponents. With kisses, they are not as good as Incubi (if your opponent is wearing any armour), but cost the same. That said, you will be taking a Shadowseer to buff your Harlies, so they can assault enemies in cover, which the Incubi can’t do without the very expensive option of adding and Archon and PGL. One (almost unique) thing that really sets them apart in the DE list is the ability to hit-and-run. This should always be used if you are in combat at the end of the opponent’s turn: there is no disadvantage to failing the initiative test, and if you pass you can move on to another target or go back in for your previous opponent ... with another Furious Charge! It can even be worth using this ability in your own turn if you think the consolidation move will get you in to cover again. At first glance, the Harlequins’ lack of dedicated transport is a disadvantage, but they suffer so badly if a vehicle explodes that it is rarely worth doing a transport swap. In fact, as they are not slowed by difficult terrain, Harlies can advance at a decent speed on foot, whilst also benefitting from great cover saves. They will not quite keep up with your skimmers, but they won’t be far behind, and have a good chance of getting to their target relatively unscathed. They can also deploy from a WWP, but suffer the same problem as everyone else – they can’t charge the turn they arrive. Nevertheless, if you buy a Shadowseer they should be able to run into cover and get a great save while they wait. Harlequins really excel on tables with very dense terrain (Cities of Death themed, for example). Here their flip-belts let them move freely whilst a Shadowseer buffs their cover save to awesome levels. Harlies make a great escort for independent characters, as they can share in that immense cover save. The disadvantage is, the IC slows the squad down because he cannot ignore the difficult terrain. The massive cover save makes them a great escort for a WWP caddy. If you want to use Harlequins, try this build: 3 Harlequins with Kisses, 1 without, Troupe Master with Power Lance, Shadowseer [170]. Alternatively, if you want to buy into some allies, you can always try the Harlie-star of Doom... Take the Harlequins as mentioned as the Elite slot in an allied Craftworld Eldar detachment. Take a Farseer with Fortune and run him with the Harlies and your Archon for incredible, re-rollable cover saves. If you run the Farseer at the front of the crew, then the Archon can Look out Sir! to take any hits that ignore cover. You will also need to take the mandatory CWE troops choice – Guardian Jetbikes generally fit in well with the DE style of play. KABALITE TRUEBORNStrengths: Special weapons! The small min squad size allows you to take just the tools for the job, with a minimum of associated chaff. Weaknesses: They are just Warriors who have 1 better A and Ld. And they’re not scoring. Despite their improved stats, they are still poor in an assault, due to their lack of survivability. If you want to hit the enemy in cc, take Wyches, Wracks or Incubi. Upgrades: Trueborn have the same special and heavy weapons available to them as Warriors, but they can take a lot more of them. The Dracon is next to worthless – a close combat leader in a squad which should never be in an assault. He doesn’t even lift your leadership. Because you don’t want to be in assault, the plasma grenades are pointless. You could bring haywire along, but generally this squad is best kept close to max range, so won’t be in a position to assault vehicles. How to use: Choose which weapons you want, max out and then hunt your chosen target. Builds to try are:
- Blasterborn. 4 Trueborn with Blasters in a Venom with extra cannon [173]. Thanks to their transport, the Trueborn have a threat range of 24”, and should inflict at least 0.889 penetrating hits on any vehicle. Meanwhile, the Venom can hose down any infantry you don’t like the look of. This is the one build where you might perhaps add some haywire grenades, but it is safer to sit near the edge of effective range picking at the enemy rather than close enough to land an assault.
- Splinter Fun. 3 Trueborn with 2 Splinter Cannons, 1 Shardcarbine, in a Venom with extra Cannon [126]. Start these with Duke Sliscus as a cheap way to lay down a huge amount of anti-infantry fire.
- Dark Lances. 3 Trueborn with 2 Dark Lances [86]. The cheapest way to get a couple of Dark Lances on the table. Sit them in good cover and snipe enemy vehicles. Per Lance, they are more expensive than a Ravager, but look like less of a threat, and can often escape enemy fire as they desperately blast away at all the cc troops rushing towards them.
- Shredderborn. This loadout was basically never used before 6th Ed, but the removal of the vehicle damage disadvantage to AP- weapons and changes to resolving blasts against vehicles mean that these are now a viable weapon against light vehicles, whilst still being primarily anti-infantry. This remains a mostly-unused option.
HEKATRIX BLOODBRIDESStrengths: A little better than Wyches in assault. Weaknesses: Not scoring. Upgrades: Bloodbrides have access to the same weapon upgrades as Wyches, but you can take more of them. And the same comments apply, ie. it’s generally better just to buy another model for the unit. A Syren brings one more attack, access to other weapons (same as a Hekatrix in a Wych squad) and the advantages of being a character, but no leadership buff. How to use: Bloodbrides don’t hit harder than Wyches, they just hit more times. There are very few situations when it wouldn’t be better to have the cheaper, scoring unit instead. A few of possible uses are:
- Counter-assault. A cheap counter-assault unit in a small (~1000pt) all-shooting list. In this case, 4 Bloodbrides (1 x Hydra Gauntlets) in a Venom with extra cannon [127] can be paired with a cheap Succubus and used as a mobile reserve. Although a Wych squad this small is ineffective, the Bloodbrides have the attacks of 6 Wyches (not charging) before you add the hydra gauntlets. They are still just as vulnerable to overwatch, but shouldn’t meet any if used to bail out units already caught in a fight.
- Cannon Fodder. Wyches don’t like overwatch. But if the enemy is already locked in combat, he can’t shoot at his new assailants. 3 Broodbrides in a Venom with extra cannon [104] can match pace with your scoring unit and charge first to take the overwatch before your more valuable, scoring, unit wades in. And if they’re fortunate enough to survive they can mount up and repeat the whole procedure again.
- Go for the kill. 9 Bloodbrides, 3 special weapons, Syren w/ Agoniser, Raider [237] +Succubus. Just as fragile as Wyches, but generally throw enough attacks to get a decent kill count. Still not scoring though.
Acknowledgements... Many thanks to Nesbitt_bub1, who inspired me to have a crack at this and whose posts have informed a lot of the first draft. Thanks also to Revener, Mushkilla, Shadows Revenge, Thor665, Seshiru and Crazy_Irish for feedback and input which has influenced the final content of this article.
Last edited by Plastikente on Tue Jan 22 2013, 21:19; edited 3 times in total | |
| | | | Plastikente
Sybarite
Posts : 373
Join date : 2012-11-15
Location : London
| | Subject: Re: DARK ELDAR UNIT GUIDE - Plastikente Mon Dec 10 2012, 23:40 | |
| PART FOUR - FAST ATTACK Dark Eldar are arguably the fastest and most manoeuvrable army in the game, and this section is where they show it. Hit your opponent hard and fast, and leave him reeling in the dust of your departure! HELLIONSStrengths: Jump Infantry. Decent assault weapon shooting. Reasonable hitting power in assault. Can be troops if you take a certain special character. Weaknesses: Fragile, both to shooting and in assault. Upgrades: The Helliarch is a standard character upgrade, with access to a few toys:
- Phantasm Grenade Launcher. Essential if you plan on assaulting units in cover, and useful for a little bit of protection against overwatch.
- Venom Blade. This upgrade is free, and improves your chance to wound any opponent with T>2. All you lose is the ability to hurt vehicles, but at your S you weren’t going to do much anyway.
- Stun Claw. Allows you to try to snatch an independent character out of a unit to bully without backup. The drawback is, Hellions don’t make great bullies. You can make a tactic from snatching a character into range of a more intimidating unit (like Incubi), who then wade in to finish him off. Beware though, the snatched character can still challenge, meaning that you lose your weight of numbers or one of your characters has to sit out of the fight.
- Power Weapon/Agoniser. Useful to add a bit of armour-piercing punch to the squad. A general breakdown of these weapons is given in Part 1.
How to use: Small units of Hellions suffer terribly from fragility, so 10+ is generally the way forward to ensure that you are still a threat after a round or two of shooting. Units of any size need to hug cover and require a pain token asap to give them some semblance of survivability. In an assault they fight slightly better than Wyches (higher S), but aren’t as durable because they can’t dodge. However, when you add the effect of their Splinter Pods (an assault weapon) and Hammer of Wrath attacks, they really can hit hard on the turn they charge. Hit and Run is a real boon for this squad, helping them to leap-frog up the table by assaulting an enemy and then using the disengage move to travel on past them. This is definitely worthwhile in the enemy’s turn (so that you can charge again in your next turn), and can even be useful in your own turn, provided you can get the unit into some cover or out of LOS when you disengage. Similar to Wracks, Hellions are a so-so choice in their own area of the Force Org, but offer great skills in the Troops section. Add the fact that Baron Sathonyx has a load of other abilities that improve the hitting power and survivability of Hellions and you will find that very few lists take this unit without him. BEASTMASTERSStrengths: Fast, and not slowed by difficult terrain. Combat monsters, which can be configured to take on many different opponents. Cheap. Weaknesses: More anti-infantry for an army that already has plenty of options. Upgrades: Each beastmaster may be accompanied by a number of beasts of 1 kind. If you take multiple beastmasters, they do not have to each take the same type of beast.
- Khymerae. Lots of attacks at Smurf strength. Khymerae add durability to the squad due to their invulnerable save, and should therefore be always left at the front to take shooting.
- Clawed Fiends. High S, and T, but fewer attacks than you get from investing the same points in other types of beast. If you have an equal number of Clawed Fiends to other models in the squad, you get to use his toughness as the majority value. However, as soon as they are outnumbered, the enemy can roll to wound them at T3, negating one of their big advantages. CFs are great for taking LOS rolls to protect attached ICs, because there is very little which will instant-kill them and they get more dangerous as they are damaged.
- Razorwing Flocks. Lots of attacks at DE strength, but they are rending – take these to deal with armoured infantry, and they can even threaten vehicles up to AV 12. Beware S6+ weapons though, which will insta-kill your flock.
Beastmasters are characters, although their stats just match a standard Wych without combat drugs. The judicious use of challenges can protect your beasts from a killer character, allowing them to set about his squad in peace. Equally, they can absorb challenges aimed at any attached IC with the squad. Beware using your last beastmaster this way though, as beasts’ leadership is very poor without them. One beastmaster may also take an improved cc weapon. This is far from essential, as most of the combat effect comes from the beasts themselves, nevertheless, a power weapon or Agoniser can provide the AP that your other attacks are missing. How to use: Beasts are fairly simple to use – select which type you want, point them at the enemy and move as fast as you can towards them until you can assault. The Beastmasters themselves and Razorwing Flocks are fairly fragile, but these can be protected with Clawed Fiends to raise the majority T (for CF only squads) or Khymerae to take shooting on their invulnerable save. Never mix Clawed Fiends with other beasts in one unit, because they will lose the benefit of their toughness. Khymerae and Razorwing Flocks, on the other hand, do make a good pairing. Beasts should always make maximum use of cover, as they are not slowed by it. Nevertheless, they do suffer the standard initiative penalty for charging through difficult terrain. Many people like to pair beasts with Baron Sathonyx so that they can benefit from his special rules, particularly Stealth, Hit and Run and his PGL. Suggested builds for Beastmaster units:
- 3 Beastmasters, 5 Khymerae, 4 Razorwing Flocks [156]. For a comparable price to a medium squad of Wyches in a Raider, you can get these. On the charge they throw out 50 attacks, 24 of which are rending. Ouch.
- 3 Beastmasters, 3 Clawed Fiends [156]. For the same price, you could get these. On the charge they throw 15 high strength attacks, plus a few from the beastmasters, but they still have plenty of wounds, a nice high T for survivability, and they get more dangerous as they take damage.
SCOURGESStrengths:Mobile. Carry lots of special/heavy weaponry. Can be customised for AI or AV. May deploy by deep strike. Weaknesses: Expensive, still fragile Upgrades:Solarite. A standard character upgrade, with leadership buff and access to cc weapons. The blast pistol is expensive and has a tiny range and Scourges have no business being in an assault, so this character is probably best left with his shardcarbine if you want to take him. While Scourges can’t achieve quite the same density of special weapons as Trueborn can, they are a respectable second, and offer the mobility of jump infantry. Their weapon options can be loosely divide into : Ant-Infantry. These options complement the Scourges’ basic weapons loadout well, but DE lists have access to plenty of AI, so they are hardly essential in this configuration.
- Shredder. A bit of a buff for AI shooting. Not much better than a shardcarbine (depending how many you can hit with the blast), but not that expensive either.
- Splinter Cannon. Apart from the range, this also doesn’t add much over a shardcarbine (assuming you want to move). But it gives you a lot of shots if you are having to snap-fire anyway.
Anti-Vehicle. If you take these options, Scourges become one of the limited number of AV choices available to you. As always though, they must be chosen in the context of your whole list.
- Dark Lance. Almost pointless. You take Scourges for their mobility, but if they move, the DL can only snap fire. You may as well have a Blaster for the same points – on a Scourge it has almost the same effective range as a stationary Dark Lance.
- Heat Lance/Blaster. The relative merits of Heat Lances and Blasters were discussed in Part 1. In short, Blasters offer good effect at a longer range, and have the strength to also worry MCs. Lances give you a greater probability of a vehicle kill, provided you get right in close to benefit from the melta rule. Getting close enough to use a Heat Lance is pretty suicidal for Scourges. If you choose to go that way, Deep Strike is pretty risky, as you could easily scatter out of melta range. A well-placed WWP is a much more reliable way of getting them into the kill zone to take out a vehicle.
- Haywire Blaster. Again, this weapon was discussed in Part 1. The advantage with taking it on Scourges is that it lets them keep a greater distance from threats, whilst reliably stripping 1-2 hull points off any vehicle each turn. It’s not likely to stop anything in its tracks, but suffers no problems from Blessed Hulls, Ceramite Armour, Quantum Shielding or any other tricks out there (as yet...). If you take this loadout, make sure you wait to fire your Scourges last, and then pick on a vehicle that has already taken a bit of a beating in the hope of finishing it off.
How to use: Scourges cost as much as Reavers, but aren’t as tough, aren’t as manoeuvrable and don’t get a jink save. What they can do is deploy by deep strike, take slightly more special weapons (and a greater variety) and have a slightly better basic save with a pitiful invulnerable one tacked on too. Scourges are best fielded in squads of 5 or 10, in order to maximise the number of special/heavy weapons you can bring with them. Max out on one of the weapon upgrades discussed above (mixing usually isn’t optimal as everything has slightly different ranges/optimal targets) and then pick on your target of choice. Scourges have plasma grenades, and although they have almost no business assaulting they could be used to overwhelm a stray survivor or two, or to have a desperate pop at an AV10 vehicle if all else fails. REAVERSStrengths: Oh so fast! 4++ cover save which can be improved to 3++ if you move flat out. Can be configured for AI or AV role. Can attack even at max speed (bladevanes). Ability to move-shoot-move. Weaknesses: Expensive, poor armour, vulnerable to attacks which ignore cover. Upgrades: - Arena Champion A standard character upgrade, who can choose from the usual selection of Venom Blade, Power Weapon or Agoniser. Take him if you want the leadership buff, and/or a little more punch if you like to assault with your Reavers.
- Heat Lance/Blaster You can tool up a proportion of you bikes for an anti-vehicle role. The relative merits of Heat Lances and Blasters were discussed in Part 1 and the Scourges entry. Unlike Scourges, Reavers can make use of their jetbike move in the assault phase to try and get and back off a bit after getting in close to get the most out of a Heat Lance.
- Cluster Caltrops For slightly less cost than another bike, you can upgrade some to have bladevanes which are slightly more than twice as effective. The trick with this upgrade is resisting the temptation to make a bladevane attack every turn in order to get your money’s worth. Doing that puts you at risk of making a foolish move which will leave your bikes in the open to be gunned down or (worse) assaulted.
- Grav Talon Makes your bladevane attacks (only from the upgraded bike) pinning. Worth the investment against lightly armoured targets, but against MEQ you need 3 Grav Talons on average to get 1 unsaved wound and force a pinning check.
How to use:
- Remember Skilled Rider. Check it out! (BDB p.41) A bonus to jink saves and you don’t need to worry about dangerous terrain. These are a real boost to your survivability. This also leads on to 2 things you need to remember to extend your Reavers’ life:
- Keep moving. Without your jink save, your armour is no better than a Kabalite Warrior.
- Avoid templates. Anything that ignores cover will be the death of you.
- Bladevanes vs. Splinter. I have mathhammered the expected damage for one round of shooting/bladevaning against my standard targets below.
| Weapon | vs MEQ | vs TEQ | vs GEQ | vs MC | | Splinter Rifle (Rapid Fire) | 0.222 | 0.111 | 0.667 | 0.222 | | Bladevane | 0.333 | 0.167 | 0.889 | 0.111 | | Cluster Caltrops | 0.972 | 0.486 | 1.944 | 0.389 |
Note. These numbers were worked out for the averaged number of bladevane and caltrop strikes (2 and 3.5 respectively), and assuming that the splinter rifles were in rapid fire range.
This shows that you will get more kills on average by bladevaning pretty much any target that isn’t a monstrous creature, and cluster caltrops rock! But this doesn’t take any Heat Lances/Blasters in the unit into account. With 1-in-3 packing these, shooting becomes equally as effective, provided the enemy is not in cover.
Bear in mind that you can only bladevane when turbo-boosting, and thereby sacrificing your assault phase Eldar Jetbike move. Also, to bladevane a unit you have to physically pass over it – this requires some careful thought to ensure you don’t leave yourself exposed to shooting or an assault at the end of your move.
- Consider assault. Reavers are relentless, meaning that they can still assault after firing their splinter rifles. They carry a pistol and ccw for the extra attack, take combat drugs, and have a T buff compared to your standard DE. And they get a free Hammer of Wrath attack – it’s only S3, but it automatically hits. So, despite the fact that I just “proved” that bladevanes were better than your guns, you might want to shoot anyway, and then swoop in for the assault.
- Avoid being assaulted. Reavers have an ok T, and a poor save. They don’t want to be on the receiving end of a charge. Moreover, without Hit and Run, once they are caught in an assault your opponent has pinned them in one place, disabling their main advantages – manoeuvrability and speed.
- Move-shoot-move. As Eldar jetbikes, Reavers can make an extra move in the assault phase. Use this to get them out of line-of-sight, into cover, or even just to rearrange so that the models closest to danger (first casualties) aren’t your special weapons or champion.
- Endgame objective denial. Although they are not scoring (except in the Scouring mission), Reavers are a denial unit, and their massive speed allows them to wait until turn 5 before swooping to contest an objective or claim linebreaker.
- Screening. If the enemy has to shoot through your Reavers to hit something, then the target unit gets a cover save. This can be used to give a little more protection to a unit caught in the open whilst your flat out Reavers still get a decent jink.
Standard Builds: 6 or 9 Reavers w/ max Heat Lances/Blasters [156-243]. Add an Arena Champion with weapon if it suits your style. Min unit sizes are too fragile to be of much use. Acknowledgements: Many thanks to the large number of people whose posts and feedback helped to inform this article: Revener, Nawari, Atnas, Khain Mor, Immelman, Skari, Mushkilla, foeofnight, Orthien, Super Dave, Thor665, Massaen, Grumpy Kwi, squierboy, Shadows Revenge and Cavash.
Last edited by Plastikente on Tue Jan 22 2013, 21:18; edited 1 time in total | |
| | | | Plastikente
Sybarite
Posts : 373
Join date : 2012-11-15
Location : London
| | Subject: Re: DARK ELDAR UNIT GUIDE - Plastikente Mon Dec 10 2012, 23:41 | |
| PART FIVE - HEAVY SUPPORT Unsurprisingly, this is where the real heavy hitters in the army list can be found, including several of the Dark Eldar’s options for taking out vehicles. Pretty much every unit in this area of the Force Org chart is exceptional, and you can’t go far wrong by maxing out on Heavy Support choices in almost any list you build. RAVAGER Strengths: Manoeuvrability of a fast skimmer. Deadly armament. Can fire all guns at cruising speed. Weaknesses: Light armour. Upgrades:
- Disintegrators. You can swap your Dark Lance armament for these at no cost. DL Ravagers are more common because DE armies usually need to maximise the anti-vehicle fire they can bring, but if you have that covered, a disintegrator Ravager absolutely annihilates armoured infantry.
- Night Shields. These can be useful for extending the life of a Ravager. They’re great for reducing your exposure to mid-range weapons like plasma guns, and can even offer a turn of protection against weapons with 48” range because you can hug your board edge when you deploy and then move at cruising speed to get in range and unload with everything at full BS.
- Flicker Field. Of limited use, because you can get a 5+ jink save just by moving. For the paranoid though, the FF does offer a couple of advantages:
- Still works before you’ve moved (like if the enemy gets the first turn).
- Still works against weapons which ignore cover, and in assault.
Nonetheless, the FF doesn’t offer much that you can’t get by careful placement and keeping moving.
- Retrofire Jets. If you are going to start your Ravagers in reserve, these can be really useful in getting you a shot on side/rear armour that your opponent didn’t see coming.
- Everything else. Other vehicle upgrades were covered in Part 2 (Core Units). While they have their uses, they all required that you get close to the enemy to get an effect, and a Ravager doesn’t want to be anywhere near the enemy.
How to use: Fly around at max range, shooting the enemy to bits. Ravagers are the most cost-effective way for us to bring heavy weapons to the table; they have a great manoeuvrability and good BS. This will make your Ravager a prime target for your opponent, but this is not such a bad thing as it sounds – every shot aimed at your Ravagers is not taking out troops in your Raiders and Venoms. Unlike our flyers, the Ravager can bring its guns to bear from turn one, and you will generally want to make use of that to deploy them on the table and try to hit your enemy first. Make maximum use of cover to try to mitigate your fragility, and keep moving to get your jink save. Night fighting can really help in this area. Don’t waste points on upgrades that you are very unlikely to use – only Night Shields are likely to give you a decent payback, and even they are far from essential as your front and side armour is bolter-proof (unlike Raiders). Suggested build: Ravager w/ Night Shields [115]. TALOS PAIN ENGINE Strengths: Tough, scary monstrous creature. Weaknesses: Slow, no invulnerable save. Upgrades:
- Twin-linked Liquifier Gun. Liquifier Guns are generally awesome, with a 50% chance of melting straight through power armour every time they fire. Add the ability to re-roll failed wounds, and they become truly terrifying to the enemy.
- Ichor Injector. Gives your attacks a chance of inflicting instant death. Useful if you want to hunt characters in close combat and for multi-wound TEQ, but not so effective against other monstrous creatures as it is toughness-based.
- Chain Flails. Your average number of attacks with chain flails rises to 4.47, from 3.5 usually. Also, the random distribution gets skewed to the right, so high numbers are more likely than those frustrating 1s and 2s. Can be worthwhile for an assault-Talos, if you have the points to spare.
- Extra CCW. Costs 5 points more than the chain flails, and increases your average number of attacks to 4.5, although these are on an even spread between 2 and 7. This upgrade is pointless if you have taken the TL liquefier – as you exchange a CCW to get that then the extra just brings you back to 1 in total and doesn’t give you an extra attack.
- Stinger Pod. Gives a slightly better effect against infantry than the bog-standard TL splinter cannon. Useful, but hardly essential.
- Twin-linked Haywire Blaster. Will probably cause 1 glancing hit per turn on enemy vehicles. Not that impressive – at long range you’ll get more effect from just shooting infantry with the splinter cannon, but at short range the Heat Lance is much more effective.
- Twin-linked Heat Lance. Useful if you want to go hunting vehicles with your Talos. The main threat will actually come from an assault, but this is useful for softening the victim as you approach. And if you are lucky enough to pop a transport with it in the shooting phase, then you are allowed to charge the occupants.
- Twin-linked Splinter Cannon. Not actually an upgrade, as the Talos comes with this. Despite the advantages of the other tail options, the Splinter Cannon is often the best due to its long range and reliable damage output. Use it to pick on depleted squads in order to win pain tokens for you Talos.
How to use: The Talos is a great psychological weapon. Opposing players seem to be inordinately scared of what they can do, and will therefore devote a lot of firepower to trying to take them out, and will often avoid moving units or vehicles too close. This effect will also apply to a WWP if you still have a Talos in reserve – only a foolhardy foe will get too close if he knows that there is a TL Heat Lance and/or Liquifier gun just needing a 3+ to appear. The best use of a Talos is therefore for area denial. It is always worth hugging terrain (and MCs can benefit from area terrain in 6th Edition), as you have move through cover and without an invulnerable save you are always vulnerable to high strength, AP3 shots. It is almost always worth attempting a charge on anything that strays within 12” of the Talos – with the high toughness it is almost immune to overwatch, and the enemy will be in a world of pain if you do get those high numbers. Remember the value of Smash Attacks, which will give you a better chance of taking out vehicles, and will insta-kill most characters even without an Ichor injector. Another useful trick is your Hammer of Wrath attack, which auto-hits at your full strength and I10. This is a big deal if charging through cover, as the Talos doesn’t have grenades. It can even be used to snipe dangerous models if your opponent has not been careful with his model placement – the HoW attack has to go to the model in base contact with the Talos, and the Talos has to take the shortest route to the target squad, so if that Sergeant with Power Fist is stood out front, he’d better make his save... Suggested build: Talos w/ Twin-Linked Liquifier [105]. If you want to be able to threaten vehicles at range, add a TL Heat Lance. CRONOS PARASITE ENGINE Strengths: Pain token multiplier, high toughness, access to AP3 weapons. Weaknesses: Short range, slow, no invulnerable save, not great in assault. Upgrades:
- Spirit Syphon. Not actually an upgrade – you get this included in the cost of the Cronos, but it’s worth discussing specifically. This is a flamer that was practically designed to melt Space Marines. And every time you get a kill with it, you can give a pain token to a nearby friendly unit. This disadvantage is, you need to get *really* close to use it, and the Cronos isn’t great in an assault.
- Spirit Probe. Allows the Cronos to dish out pain tokens if it gets a kill in assault. Thing is, the Cronos isn’t that great in an assault, so you probably want to avoid getting in the position where this upgrade will benefit you.
- Spirit Vortex. Lower strength than the Spirit Syphon, but a much more useful range (although still not that long). A significant points investment, but worth it.
How to use: The Cronos is unusual compared to the other Heavy Support slots, because unlike the rest, it’s not incredibly killy. It can act as a real force multiplier though, and shouldn’t be written off. In an assault it’s not terrible, but certainly nothing compared to a Talos, and its low number of attacks makes it liable to get tarpitted. If you haven’t paid for a Spirit Probe, you can’t then make use of the Cronos’ special abilities. It is always worth buying a Spirit Vortex for a Cronos because it allows you to keep the enemy at arm’s length. The lower strength does make it harder to kill SMurfs, but you still burn straight through power armour and you only need to get one kill to benefit. To make use of the Cronos, you need to keep other unit nearby to benefit from the tokens he dishes out. As he is so slow, this requires some thought at the list building stage. One option is to deploy via WWP, allowing you to arrive up-table and near the action. Alternatively, if you love MCs (or are running a coven-themed list), a Cronos paired with 2 Talos makes a very imposing centre-field. These units can benefit particularly from FnP as their lack of invulnerable save makes them a prime target for krak missiles. Obviously, if you go down that route then you will need to find your ranged anti-tank elsewhere (Blasterborn anyone?). Suggested build: Cronos w/ Spirit Vortex [100]. RAZORWING JETFIGHTERStrengths: Flyer, nasty anti-infantry missiles. Weaknesses: Paper-thin armour. Upgrades:
- Disintegrators. For no cost, you can swap your Dark Lances for these. These fit better with the aircraft’s other weapons, which are suited for an anti-infantry role. Nevertheless, many players prefer to keep the DLs for the flexibility to take on vehicles, and particularly enemy fliers.
- Splinter Cannon. You can only fire 4 weapons per turn, so you may not get much use out of this upgrade, although it does have a number of advantages:
- Doesn’t scatter, so is safer than your missiles if everyone is packed in close together.
- Can fire at flying monstrous creatures.
- Gives you a greater total AI capability if you have taken Dark Lances.
- Missiles. All of the missiles available to the Razorwing are Large Blasts. I have mathhammered the chances of getting a wound on each individual model caught by the blast:
| Weapon | vs MEQ | vs TEQ | vs GEQ | vs MC | | Monoscythe | 0.278 | 0.139 | 0.833 | 0.111 | | Necrotoxin | 0.278 | 0.139 | 0.833 | 0.278 | | Shatterfield | 0.324 | 0.162 | 0.648 | 0.250 |
As can be seen, Necrotoxin doesn’t increase kill rates against anything that doesn’t have a very high Toughness to start with (although it is pinning). The Shatterfield gives you a slightly better kill rate against MEQ and TEQ, but AP- makes you worse off against lightly armoured units. Also, the Shatterfield’s higher strength gives it moderate effectiveness against light vehicles too.
All told, the free Monoscythe missile is pretty effective anyway, so it is rarely worth investing more points in a unit which is already expensive in order to get a slight increase in missile kills.
- Night Shield. Very useful. Because your armour is so thin, even Bolters have a chance of glancing you, and the number of shots mean that they’ll get a few hits even snap-firing. Night shields are great for reducing your exposure to small arms fire, and particularly from rapid fire.
- Flicker Field. Invaluable. Unlike skimmers, Flyers don’t get jink for moving, if they want it, their shooting next turn is downgraded to snap shots only (and therefore missiles can’t be fired). With a Flicker Field, you never have to evade.
How to use: Zoom around the table, annihilating troops with your missiles. If you have stuck with Dark Lances, you can always switch target if required to take on some armour or other flyers. The limits of Flyer movement require a bit of thought to get the most out of your assets. [EDIT: This got FAQ'd in v1.3 so we can't deep strike any more  ] If the enemy already has flyers on the table when you arrive, Deep Strike is a great option to stick you in their rear fire arcs where you can have a go at their weak rear armour and they can’t manoeuvre to shoot back at you. Remember, if you scatter when deep striking, your vehicle facing doesn’t change, so you should still find the enemy in your fire arcs unless you are very unlucky.Beware though, your own armour is pitifully thin, so you will want to take out anything with skyfire and/or intercept with other units before your flyer turns up. Even a lowly Guardsman can expect to get 1.5 penetrating hits on you with a Quad Gun (if you don’t evade/have a Flicker Field). Suggested build: Razorwing w/ Night Shields, Flicker Field [165]. VOIDRAVEN BOMBER Strengths: Flyer, killer anti-tank gun. Weaknesses: Light armour, gets expensive if you want missiles. Upgrades:
- The Voidraven has access to all the same missiles as the Razorwing, and also Implosion Missiles:
| Weapon | vs MEQ | vs TEQ | vs GEQ | vs MC | | Implosion | 0.833 | 0.556 | 0.833 | 0.500 |
The great thing about implosion missiles is that they cause instant death (following a characteristic check – see the codex, p.47). This could make them great against multi-wound armoured opponents. The downside is, you can still take cover or invulnerable saves against them, so it’s not that hard to dodge their effects.
The problem with taking missiles of any sort on the Voidraven is that you have to pay extra for them (a lot extra, in the case of implosion missiles). The missiles are all anti-infantry, whilst your main armament is the best long-range anti-vehicle weapon we have access to. Therefore, to get the most cost-effectiveness out of your Voidraven you should avoid missiles altogether and just concentrate your Void Lances on enemy armour and flyers.
- Night Shield. See the comment for the Razorwing Jetfighter. The big difference is, the Voidraven doesn’t need to worry about Bolters in front or to the sides, so this becomes less of a worthwhile investment.
- Flicker Field. See the comment for the Razorwing Jetfighter - it applies to the Voidraven in exactly the same way.
How to use: Ironically, the Voidraven “Bomber” plays much more like a dedicated air combat plane which can target ground armour in a pinch whereas the Razorwing “Jetfighter” is optimised as an anti-infantry ground attack craft. How to use? Fly around the table, targeting enemy armour. If he has any flyers, the Deep Strike trick will again pay dividends. If you happen to fly over an enemy vehicle, the Void Mine has a reasonable chance of hitting it, but your Void Lances are your most flexible and reliable weapon on this flyer. Suggested build: Voidraven w/ Flicker Field [155]. Acknowledgements: Many thanks to Zilverscale, Massaen, colinsherlow, Mushkilla and Seshiru, whose feedback helped shape the final content of this article.
Last edited by Plastikente on Sat Feb 23 2013, 10:35; edited 4 times in total | |
| | | | Plastikente
Sybarite
Posts : 373
Join date : 2012-11-15
Location : London
| | Subject: Re: DARK ELDAR UNIT GUIDE - Plastikente Mon Dec 10 2012, 23:41 | |
| PART SIX - SPECIAL CHARACTERS Special Characters are the Archetypes of numerous Dark Eldar units and traits. Looking for an über-Wych, über-Haemonculus, über-Hellion, über-Incubus or even the Supreme Overlord of Commoragh? They’re all here. For fluff, they’re hard to beat, but in terms of combat effectiveness they offer very little that you can’t get for cheaper by tooling up a standard HQ. Nevertheless, many offer certain special rules which you can’t get into your army any other way. Note: To avoid infringing GW Copyright, I have had to be especially careful in this article not to spell out which wargear and special rules each character has. I advise reading with your Codex open to cross-reference. ASDRUBAEL VECTStrengths: Awesome at close range due to wargear and Ancient Nemesis. Master Tactician. Fearless. Weaknesses: Very expensive. No long-range shooting capability. No capability to deal with 2+ Sv. Wargear and Abilities:
- Obsidian Orbs. Useful, but short range. Vect’s massive BS means they should seldom scatter, and they will kill SMurfs outright on a 2+. Watch out for 2+ saves though.
- Sceptre of the Dark City. Mitigates for Vect’s poor (ie. Dark Eldar standard) strength, and burns straight through most armour. Combined with his massive I, high attacks (+1 for 2 close combat weapons) and Ancient Nemesis rule, this weapon makes him fearsome to all opponents in an assault. Unless they are wearing Terminator Armour (or equivalent), in which case they will just laugh as his puny blows bounce off them.
- Ancient Nemesis. As mentioned above, this rule gives Vect an extra edge against everyone in close combat, and doubly so against Eldar and Dark Eldar.
- Dais of Destructor. A pimped up Raider/Ravager which is really not worth the inflated points cost. It can’t take any wargear, so no Nightshield or Flicker Field to protect you, and it can’t swap its lances for Disintegrators to give Vect that much needed close support against Terminators. It has to start the game full, and Vect is a combat monster, meaning your armoured Ravager (which would prefer to sit at max range and take pot shots at armour) must zoom forwards to deliver its passengers, unless you perform a turn 1 passenger swap. But Vect can’t get into another vehicle in the same turn that he gets out of the Dais.
- Master Tactician. Useful to have up your sleeve if forced to deploy second, but it is not reliable enough to let you risk placing units in the open at deployment.
How to use: Vect is very expensive close combat monster. Give him an escort and use him like any other assault-tooled Archon. He is still a low toughness character who is not an Eternal Warrior though, so his survivability is limited after his Shadowfield goes, even with his moderate backup save. He carries grenades, but no phantasm launcher, so his unit can’t benefit from them on the charge. The grenades do, however, give him an option against vehicles, if required. LADY MALYSStrengths: The only psychic defence in the army list. Deployment tricks (Precognisant). Invulnerable save. Lots of attacks (Lady’s Blade) Weaknesses: No guns. No capability to deal with 2+ Sv. The psychic defence only affects Malys’ unit. Wargear and Abilities:
- The Crystal Heart. Read the Codex entry. Given the increase in the effectiveness of Psykers, this can be very useful, but it only protects 1 unit, and can’t prevent the enemy from buffing himself with powers (eg. Grey Knights’ Hammerhand).
- The Lady’s Blade. Basically a Djinn Blade that won’t bite its bearer. The extra attacks are handy whilst they last. No better than a standard weapon against Terminator armour though.
- Invulnerable Save. Does exactly what it says on the tin. Won’t short out like a shadowfield, but doesn’t protect as well either.
- Precognisant. Lets you move some units after your opponent has deployed. Useful for making a bluff if you deploy first, but is useless if you deploy second.
How to use: Malys is a variety of cc-tooled Archon, but you could make a more effective build for less points by just taking a normal Archon. She has an Invulnerable Save, but it’s no Shadowfield, making her less survivable than most standard Archon builds, but also less hampered by that infamous first-save fail. She has reasonable hitting power in an assault, provided you aren’t meeting any 2+ saves. What she brings that you can’t get any other way, is her psychic defence, however, as mentioned, it can only shield one unit at a time. If you are the kind of player to run a death-star unit, her Crystal Heart could make them that much harder to take down, but if you just run her with one of many assaulting similar units the enemy will just turn his Psykers on something unprotected. DRAZHARStrengths: TEQ-level save, immune to instant death, low-AP weapons, high WS, I and A. Drazhar is a close combat assassin. And he’s fearless. Weaknesses: Very expensive, can’t shoot, no grenades, no invulnerable save. Wargear and Abilities: Kit-wise, Drazhar is basically a Klaivex with a better armour save. That save makes an important difference though with the current lack of low-AP weapons since the change to the rules for power weapons. Note that his own swords will chomp through Terminators as easily as any other model. As mentioned in the section on Incubi in Part 2 of this guide, the strength increase almost always performs at least as well as the attack increase you could choose instead.
- Master of Blades. Limits Drazhar to only joining Incubi, but gives him both Klaivex powers. Unfortunately, this is quite a limitation, which pushes his effective cost up even more, as you will want an escort to stop him from getting sniped.
- Darting Strike. A very useful trick that will let you pick on the enemy you want to take out, provided there is space to get into base contact. Lookout Sir! limits its effectiveness against characters, but if you want to take out a power fist or other special weapon, this is ideal.
- Riposte. Allows Drazhar to strike back sometimes when he passes a save. Unfortunately, the only people who are really a danger to Drazhar are those which can disallow his save, so he won’t be slapping them back anyway.
How to use: In an army full of close combat monsters, Drazhar is near the top of the pile. Unfortunately his cost shows this, making him significantly more expensive than anyone else in the army, bar Vect. It is quite difficult to get a good return on this investment (for the same price you could have, say, 2 Ravagers) and if you want to take an HQ for competitive reasons (rather than fluff, or because you like the model) you can get at least as good an effect for less cost by tooling up an Archon. If you definitely want Drazhar though, you need a delivery system for him. That means a transport (probably) or a Webway Portal, and a unit to take the shooting for him. As he can only join Incubi, this ablative shield for him is very expensive, and most importantly doesn’t have grenades, unless you shell out for yet another character with a Phantasm Grenade Launcher to join them. This drives up Drazhar’s exorbitant cost even more. Once you do get into combat, Drazhar is going to annihilate whatever he touches. He comes with both Klaivex powers (discussed in Part 2) and his Riposte rule lets him slap anyone who has the temerity to survive long enough to strike him. The Darting Strike rule is what really turns him into an assassin though. You generally won’t want to issue challenges with Drazhar, as that would let the heroic sergeant sacrifice his 1 wound on your many high strength, low AP attacks. Instead, use Darting Strike to place Drazhar in base contact with his target so that you can allocate hits to it. Either your opponent will use Look Out Sir!, sacrificing other squad members and increasing your combat resolution, or your target will face the full wrath of Drazhar. By the same token, you should always escort Drazhar with a Klaivex (yet more cost!) to take challenges from those heroic sergeants and let the killing machine go about his business. Or, if you are set on a deathstar unit, Baron Sathonyx or Lady Malys (see separate entries) can add useful buffs to your cornerstone unit. It all drives up the cost though! As with Incubi squads in general, Drazhar also has to watch out for being a victim of his own success. Very few squads will last more than a turn with him and his escort, leaving you stuck in the open with an army’s worth of gun barrels pointed your way. The other problem to watch out for is high toughness monstrous creatures, which will be difficult for you to wound but can squash you with ease. LELITH HESPERAXStrengths: So many attacks! Massive WS and I, Quicksilver Dodge, Penetrating Blade, and she has grenades. Weaknesses: Low S limits target she can take on and low T makes her vulnerable to instant death. Wargear and Abilities:
- Plasma Grenades. Lelith barely wears any clothes, let alone carrying wargear!... But nevertheless, she manages to secrete assault grenades somewhere about her person; remember that you can throw these, using her massive BS. She also has a shardnet and impaler hidden in her hair, so it is worth getting her into base-contact with a multi-attack model so that she can rob one of those, if the lucky fool survives her attacks.
- Quicksilver Dodge. A handy invulnerable save. Not enough to let her weather a storm of fire though.
- The Penetrating Blade. No need to worry about terminator armour...
- A League Apart. More attacks for the close combat queen

How to use: Get her into close combat and watch the fur fly! Lelith is much better value than Drazhar, coming in at about the same price as a fully tooled Archon. Even so, at that price the Archon has a Phantasm Grenade Launcher to help out his squad, a low AP weapon which causes instant death, potentially increasing strength and a better save (until he fails one). Lelith, on the other hand, has loads of attacks and doesn’t care about the opponent’s armour, although her low S means she should avoid T5+. Her dodge save keeps working after failing one, but at standard DE toughness that one fail can easily lead to her instant demise. Although Lelith can dodge bullets, she will only dodge about half of them, so try to avoid letting her get shot up. Like Drazhar, Lelith needs a delivery system, but she isn’t limited in the squads she can join. Wyches offer good synergy, Wracks can offer a higher majority toughness or Grotesques bump that even higher. Whatever squad you escort her with, it’s worth having a sergeant-equivalent to take those unwanted challenges and let her single-handedly slay the entire squad whilst the Independent Character in charge piles all his attacks into a 1-wound model. Due to her massive initiative, very little is going to flee from combat with Lelith without being cut down. URIEN RAKARTHStrengths: High toughness (for a Dark Eldar), very survivable in assault, heals himself, buffs coven units. Weaknesses: Moderate WS, I and A, poor save, can’t deal with 2+ save. Wargear and Abilities: Rakarth carries an improved flesh gauntlet, a casket of flensing and a clonefield (all of which are covered in section 2 of the guide). Notably, he does not carry grenades, so will strike last if charging through cover, and his only AP1/2 item is short-ranged, single use and not guaranteed to do what you need it to.
- Meld the Flesh. An awesome ability that allows Rakarth to keep regaining lost wounds, as long as he’s not dead.
- Father of Pain. Allows the big boss-Haemi to hand out some free pain tokens to coven units at the beginning of the game.
How to use: Urien Rakarth is not so much a close-combat assassin as the king of challenge tarpits. His own low strength and lack of power weapon make it difficult for him to land a wound (although if he ever does, it will insta-kill). However, he is fairly tough, he has feel-no-pain, his clonefield lets him shrug off a few wounds every turn, and as long as he’s not dead, those wounds keep growing back. This makes him ideal for challenging your opponent’s chief killing machine (as long as it’s not S10 or carrying a Force Weapon) just to watch him spend the rest of the game trying to hack bits off your endlessly regenerating Haemi. Rakarth is also useful for the advantages he brings to your other coven units. Handing out extra pain tokens before the game is great for giving a key unit that extra edge. If Rakarth also starts with that unit, they can easily begin the game with 3 tokens, which can make for a near unstoppable Grotesque deathstar. Lists which include Rakarth can also choose to upgrade any Grotesques to have a higher strength (helpfully, this option is on p.83, in the army list, not on p.54 with the rest of his special rules). This is well worth it to get the Grots to a strength where they can insta-kill humans and improves their chances of popping vehicle rear armour. Rakarth does bring some unique tricks to the party, but does so at a significant cost (more than a tooled Archon, but less than Vect or Drazhar). Compared to a Haemonculus Ancient, he has a higher toughness, a clone-field, and some special rules and improved wargear. Whether he’s worth it is up to the player. DUKE SLISCUS THE SERPENTStrengths: Rending venomblades, Serpent’s Venom, Low Orbit Raid, Contraband. David Bowie in space! Weaknesses: Like an Archon, but not quite as good. Wargear and Abilities:
- Serpent’s Bite. A couple of super-rending venomblades. These are what every Archon wants: a weapon which wounds on a fixed value but can also cut through terminator armour (sometimes).
- Serpent’s Venom. Note that this rule means that if you have any units of Kabalite Warriors or Trueborn in your force, then Sliscus must deploy with one of them. Whichever unit he starts with gets a buff to its poisoned shooting. Thing is, like a combat Archon, Sliscus isn’t going to want to hang around with the gunslingers for long. Remember that you can’t disembark and embark in the same turn, so the easiest thing is to start Sliscus with some foot Warriors/Trueborn who he ditches on Turn 1 to jump into a Raider of Venom carrying his escort.
- Low Orbit Raid. Lets certain vehicles in your forces have access to a special deployment option. In contrast to retrofire jets, which have a very similar effect, this rule will let passengers disembark on the turn that the vehicle arrives. This is a key advantage, because it protects them from the fireball when your paper planes get shot down.
- Contraband. An army containing Sliscus can influence the roll on the combat drugs table. This is probably the strongest reason to take him, as it massively reduces your chance of getting the 1 useless drug, and doubles your chance of getting that excellent extra pain token.
How to use: Sliscus is tooled out similarly to a close-combat Archon – everyone’s favourite forcefield, a slightly pointless (due to its range) pistol, an improved, sort-of-rending Venomblade and some grenades. He weighs in at 20pts more expensive than an Archon with the similar kit (no-one else has access to his swords), and for that you get lower WS, BS, W, I, A and Ld. His extra cost is paying for the special rules he can apply to the rest of your army. Despite the fact that he is not as good as an Archon, Sliscus is still pretty handy in an assault, and has the advantage that his weapons can deal with 2+ saves (if you get the right roll) and high toughness opponents. Sure, he has fewer wounds, but actually, any Archon has pretty much had it if his Shadowfield goes, so it arguably doesn’t make such a huge difference. On the table, Sliscus should therefore be used like pretty much any other close combat Archon. You should note his lack of Phantasm Grenade Launcher if he joins a unit that doesn’t carry their own grenades. His big attraction, though, is the aforementioned special rules. To get the most value out of Sliscus then, you should take at least one unit of splinter armed Warriors or Trueborn (the bigger the unit, the more return on your investment), and as many units as possible which use combat drugs. Low Orbit Raid is a useful trick, but probably won’t influence you to take any more or different vehicles to what you would want in your list anyway. KHERADRUAKH THE DECAPITATORStrengths: High strength, power weapon which may cause instant death, special deployment option. Weaknesses: Expensive, no grenades, low toughness, poor save. Wargear and Abilities:
- Decapitator. A power weapon that sometimes causes instant death.
- Shadow Stalker. Kheradruakh has a unique method of deployment. The inherent weaknesses in this rule are discussed later...
- Hunter of Heads. Allows Kheradruakh to gain bonuses in assault against his nominated target. Unfortunately, this special rule is also unlikely to be of much practical use to you because of the way targeting attacks in assault changed in 6e.
- Altered Physique. Other than the above, he is basically a Mandrake with better stats, with all their standard abilities. His slight perk is that the Altered Physique special rule means that he came use his baleblast as soon as he arrives.
How to use: Kheradruakh costs almost as much as Sliscus, but with essentially none of the perks. His rules seem to suggest that he could be a sort of assassin, able to deploy almost anywhere and gain preferred enemy against certain opponents, but the devil is in the detail: he has a low toughness and poor (but invulnerable) save, just asking your enemy to hose down this lone character before he can assault. If by some miracle he survives the enemy turn, he will probably have to strike last as the target character will have grabbed some cover. And he can only use the preferred enemy rule if he can direct his attacks specifically against that target, ie. if the character is not in a unit. Kheradruakh cannot issue or accept challenges, because he’s not a character, so can’t single his opponent out that way. At least he starts with a pain token, so he can get one turn of shooting off before he meets his end... In writing this series of tactica, I have tried to be even-handed and see the possible uses of every unit in the army list, but the concept of Kheradruakh as some sort of fear-inspiring assassin from the shadows has been entirely hamstring by the practicalities of his rules. I have to award this character the prize of Most Useless entry in the army list. BARON SATHONYXStrengths: Allows a certain fast attack unit to be taken as troops, abilities and wargear can seriously buff units he joins, especially fast ones, cheapest DE special character. Weaknesses: Not as good as an Archon. Wargear and Abilities:
- Custom Skyboard. A very useful buff on the turn he assaults, especially as it also affects his Hammer of Wrath attack (as per the FAQ), and because he can hit-and-run you should be getting in plenty of charges over a game.
- Bones of the Seer. This rule has been FAQ’d. It now gives +1 to your roll to decide who can deploy first, which is a very handy little edge to have as that also dictates who goes first (barring stolen initiative).
- Twilight Shroud. Very useful for increasing the survivability of any unit Sathonyx joins, particularly beast packs (not slowed by cover) and Hellions (not so worried about cover due to Sathonyx’s Master of the Skies rule).
- Phantasm Grenade Launcher. Another reason why Sathonyx is great with beasts and Hellions, neither of which carry their own grenades.
- Master of the Skies. If Sathonyx joins a unit of Hellions they get a bonus to their difficult terrain tests and advantages when trying to hit-and-run.
How to use: Baron Sathonyx is an absolute bargain, given the amount he brings to a unit he joins at the cost not much higher than a fairly basic Archon. Because he is Jump Infantry, he is ideally suited to join fast, assaulting units, such as Hellions and Beast Packs. There’s really not a lot more to say about using him – add him to one of these two units, hug cover until you’re in range, and then use hit-and-run to assault the enemy again and again and again. This is not a man to run off on his own to attack a target of opportunity – keep him with a unit, where you will get the most out of his wargear and abilities. You could use his shadowfield to tank fire at the front of this unit, but they’ll lose a lot if he fluffs his save and gets taken down. Likewise, make sure to include other characters to save him from challenges. Acknowledgements... Many thanks to Nesbitt_bub1, who inspired me to have a crack at this and whose posts have informed a lot of the first draft. Thanks also to Aschen, mug7703, Creeping Dementia, squierboy, SleepyPillow, tlronin, wanderingblacde and Mushkilla for feedback and input which has influenced the final content of this article. -Plastikente
Last edited by Plastikente on Fri May 10 2013, 18:21; edited 2 times in total | |
| | | | Plastikente
Sybarite
Posts : 373
Join date : 2012-11-15
Location : London
| | Subject: Re: DARK ELDAR UNIT GUIDE - Plastikente Mon Dec 10 2012, 23:42 | |
| | |
| | | | Plastikente
Sybarite
Posts : 373
Join date : 2012-11-15
Location : London
| | Subject: Re: DARK ELDAR UNIT GUIDE - Plastikente Mon Dec 10 2012, 23:42 | |
| | |
| | | | Plastikente
Sybarite
Posts : 373
Join date : 2012-11-15
Location : London
| | Subject: Re: DARK ELDAR UNIT GUIDE - Plastikente Mon Dec 10 2012, 23:43 | |
| | |
| | | | Squierboy
Kabalite Warrior
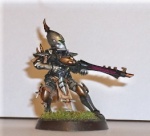
Posts : 197
Join date : 2012-09-23
| | Subject: Re: DARK ELDAR UNIT GUIDE - Plastikente Wed Dec 12 2012, 23:14 | |
| Great work so far Plastikente, a lot of work gone into the statistics obviously. Looking forward to the unit reviews! | |
| | | | Mushkilla
Arena Champion
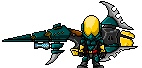
Posts : 4017
Join date : 2012-07-16
Location : Toroid Arena
| | Subject: Re: DARK ELDAR UNIT GUIDE - Plastikente Thu Dec 13 2012, 07:53 | |
| - Squierboy wrote:
- Great work so far Plastikente, a lot of work gone into the statistics obviously. Looking forward to the unit reviews!
The draft for the unit reviews is here in case you missed it link. Feedback would be appreciated (I believe Plastikente will be posting a second draft in that same thread soon). Not to mention I have noticed you tend to leave quality feedback Squierboy. | |
| | | | Squierboy
Kabalite Warrior
Posts : 197
Join date : 2012-09-23
| | | | | Mushkilla
Arena Champion
Posts : 4017
Join date : 2012-07-16
Location : Toroid Arena
| | Subject: Re: DARK ELDAR UNIT GUIDE - Plastikente Fri Dec 28 2012, 18:39 | |
| Great stuff. Glad to see this article coming along nicely. - Quote :
Weigh the risks and remember that Victory Points are how you win games, no necessarily kills.
Should this be "not necessarily kills"? Look forward to the next part. | |
| | | | Plastikente
Sybarite
Posts : 373
Join date : 2012-11-15
Location : London
| | Subject: Re: DARK ELDAR UNIT GUIDE - Plastikente Fri Dec 28 2012, 21:29 | |
| Fixed. You could have just sorted it yourself, your Modliness  If that is the one typo that slipped through the editorial process then I think we're doing fairly well. | |
| | | | Mushkilla
Arena Champion
Posts : 4017
Join date : 2012-07-16
Location : Toroid Arena
| | Subject: Re: DARK ELDAR UNIT GUIDE - Plastikente Fri Dec 28 2012, 21:53 | |
| - Plastikente wrote:
- Fixed. You could have just sorted it yourself, your Modliness
Directly editing a users post for spelling would be akin to opening Pandora's box. I only read it once, and my own spelling is pretty terrible so who knows how more spelling atrocities are lurking in there waiting to pounce on unsuspecting readers. Again thanks for all the effort you are putting into this, it's shaping up nicely. | |
| | | | Count Adhemar
Dark Lord of Granbretan
Posts : 7610
Join date : 2012-04-26
Location : London
| | Subject: Re: DARK ELDAR UNIT GUIDE - Plastikente Fri Dec 28 2012, 22:03 | |
| - Mushkilla wrote:
- Directly editing a users post for spelling would be akin to opening Pandora's box.
Any post pulling someone up on spelling or grammar must, by law, contain at least one spelling or grammar error. | |
| | | | Mushkilla
Arena Champion
Posts : 4017
Join date : 2012-07-16
Location : Toroid Arena
| | Subject: Re: DARK ELDAR UNIT GUIDE - Plastikente Fri Dec 28 2012, 22:13 | |
| - Count Adhemar wrote:
- Mushkilla wrote:
- Directly editing a users post for spelling would be akin to opening Pandora's box.
Any post pulling someone up on spelling or grammar must, by law, contain at least one spelling or grammar error. I see no mistake in your post! The law has been broken. MINIONS SEIZE HIM! The hard part is upholding the law whilst making the mistake as subtle as possible. | |
| | | | commandersasha
Sybarite

Posts : 414
Join date : 2012-12-26
Location : Wimbledon, London
| | Subject: Re: DARK ELDAR UNIT GUIDE - Plastikente Sat Dec 29 2012, 00:23 | |
| If it's not inappropriate, can I just say thank you for the work so far; I am a newcomer to the forum, and to DE, and a resource like this is a fantastic asset to someone in my position.
As a 2-year Tyranid veteran, the equivalent thread on TheTyranidHive, by a member called Loate, was instrumental in my rapid development as a 'Nid player.
Keep up the good work ;-)
(Feel free to delete this post if it is clogging up the thread!) | |
| | | | Mushkilla
Arena Champion
Posts : 4017
Join date : 2012-07-16
Location : Toroid Arena
| | Subject: Re: DARK ELDAR UNIT GUIDE - Plastikente Sat Dec 29 2012, 10:35 | |
| - commandersasha wrote:
- (Feel free to delete this post if it is clogging up the thread!)
This is the Plastikente appreciation thread so no worries there. | |
| | | | Plastikente
Sybarite
Posts : 373
Join date : 2012-11-15
Location : London
| | Subject: Re: DARK ELDAR UNIT GUIDE - Plastikente Sat Dec 29 2012, 10:50 | |
| - commandersasha wrote:
- If it's not inappropriate, can I just say thank you for the work so far; I am a newcomer to the forum, and to DE, and a resource like this is a fantastic asset to someone in my position.
Thanks are always appreciated. As are gifts. I like my slaves fresh, and preferrably some race other than Mon-Keigh - the minds are so limited that their pain is very bland. Oh, and they must still have all their fingers and toes  | |
| | | | McBegbie
Slave

Posts : 14
Join date : 2012-11-16
| | Subject: Re: DARK ELDAR UNIT GUIDE - Plastikente Sun Dec 30 2012, 22:00 | |
| Great stuff here. Just getting back in to the hobby and a complete novice to 40k and DE. Your guide is helping alot with planning my first build.
Thanks and I look forward to more updates. | |
| | | | Grokfog
Slave

Posts : 20
Join date : 2012-04-02
Location : sheffield
| | Subject: Re: DARK ELDAR UNIT GUIDE - Plastikente Wed Jan 02 2013, 16:51 | |
| Really informative and helpful, however I would like to point on an oversight in the Succubus entry. Although she doesn't have access to a PGL, she does have plasma grenades already... As does the Archon. So maybe pairing them with Incubi could be more viable/cheaper? Just a thought... | |
| | | | Mushkilla
Arena Champion
Posts : 4017
Join date : 2012-07-16
Location : Toroid Arena
| | | | | Plastikente
Sybarite
Posts : 373
Join date : 2012-11-15
Location : London
| | Subject: Re: DARK ELDAR UNIT GUIDE - Plastikente Wed Jan 02 2013, 17:00 | |
| Check the BDB, p62 - "models equipped with Plasma Grenades don't suffer the penalty to their initiative for charging enemies through cover".
In contrast, (Codex, p58) - "A model with a PGL counts as having both assault and defensive grenades, as does any squad he joins." (emphasis mine)
So the Succubus would be fine, but the Incubi would still strike last. However if you get a PGL in the mix, everyone gets to strike at their own initiative.
D'oh! Ninja'd by Mushkilla. | |
| | | | Sponsored content
| | Subject: Re: DARK ELDAR UNIT GUIDE - Plastikente | |
| |
| | | | | | DARK ELDAR UNIT GUIDE - Plastikente | |
|
Similar topics |  |
|
| | Permissions in this forum: | You cannot reply to topics in this forum
| |
| |
| |
|


